Sky View Observatory tickets: avoiding hidden booking traps
Sky View Observatory tickets are easy to compare badly. A booking page may show a lower headline price while hiding the part that matters at arrival: whether you receive a ticket that can be scanned…
Sky View Observatory tickets are easy to compare badly. A booking page may show a lower headline price while hiding the part that matters at arrival: whether you receive a ticket that can be scanned immediately or a voucher that must first be exchanged at the venue.
 Seattle
Tickets and prices
Sky View Observatory
Entry ticket · 1-day access
fromUSD20.92
Book onlineOfficial ticket · Elite Experience
fromUSD47
Book onlineThat distinction affects more than convenience. It can change where you go after entering the Columbia Center, how much flexibility you have if your plans shift, and how confidently you can build the observatory into a day of sightseeing, photography, or dining in downtown Seattle.
The hidden risks of third-party ticket aggregators
The safest way to compare Sky View Observatory tickets is to compare the entire arrival process, not only the price displayed beside the “Book now” button.
Some reseller platforms documented for this attraction sell a voucher rather than a direct-access admission ticket. In that case, the visitor arrives with a printed document or a digital code and follows the platform’s instructions for exchanging it at the venue’s box office or service desk. The voucher may need to be converted into an admission ticket before the visitor can join the elevator queue.
That is a different product from an official mobile ticket.
Not every third-party booking works in exactly the same way, so the wording in the confirmation matters. A reseller may provide a mobile voucher that is accepted at the venue, while another platform may require an exchange before entry. The problem is not simply that the ticket came from somewhere other than the official website. The problem is failing to understand what the booking actually grants you when you reach the building.
A voucher can confirm that you bought admission without functioning as the admission document used at the entrance.
What to check before paying
Look for four details in the booking flow and confirmation email:
- The issuing party. Is the ticket sold directly by Sky View Observatory, by CityPASS, or by an independent reseller?
- The format. Does the confirmation promise a scannable admission ticket, or does it describe a voucher, redemption code, or exchange procedure?
- The arrival point. Are you instructed to go directly to the attraction, or to a box office or guest-services counter first?
- The conditions. Check whether the booking is refundable, tied to a date or time, or subject to the reseller’s separate terms.
The phrase “mobile ticket” is not always enough. A mobile voucher can still require processing at the venue. The useful question is more specific: can the document be scanned for admission, or must staff issue another ticket first?
This is where third-party aggregators create avoidable uncertainty. A lower price can look attractive until the booking introduces an additional step at the exact moment when you want to move efficiently through the building. If your schedule includes dinner, a ferry, a museum visit, or a sunset photography window, that extra step has practical consequences even when it does not appear as a separate fee.
Reseller terms also deserve more scrutiny than the headline price. Some bookings are non-refundable or difficult to change. A ticket that seems inexpensive may be poor value if the weather turns cloudy, your arrival time changes, or the viewing conditions are not suitable for the photographs you planned to make.
The best sky view observatory online vs gate tickets comparison is therefore not “online is cheaper” versus “the box office is safer.” It is a comparison of certainty:
- Do you know exactly what document you will present?
- Do you know whether your chosen time is reserved or merely requested?
- Do you know what happens if the venue is busy?
- Do you know whether you can change or cancel the booking?
Those answers are more useful than a generic recommendation to buy from any website offering a discount.
Decoding official pricing: Standard, Sip & Sights, and Elite packages
Official pricing is easier to understand when the packages are treated as separate uses of the visit rather than as good, better, and best versions of the same ticket.
The first decision is whether you want admission only or intend to spend at the café or bar. A food-and-beverage credit can be useful when it replaces a purchase you were already planning to make. It is less useful when it is added simply because the package looks more complete.
Standard Admission
Standard Admission is the straightforward option for entering the observatory and spending time on the 73rd floor. It suits visitors who want the view, the architecture, and the photography opportunities without prepaying for food or drinks.
This is usually the cleanest choice for a tightly planned visit. It keeps the booking focused on the core product: access to Sky View Observatory.
Choose it when:
- the observatory is one stop in a larger itinerary;
- you do not know whether you will want to use the café;
- your priority is viewing or photography rather than a bundled dining experience;
- you want to avoid paying for an inclusion you may not use.
Sip & Sights
Sip & Sights combines admission with a beverage-related credit or inclusion. Its value depends on your actual plans inside the building. If you already expect to purchase a drink while taking in the view, the package may be a convenient way to bundle the two parts of the visit.
If you are treating the observatory as a short photography stop, however, the additional inclusion may have little practical value. The question is not whether the package sounds pleasant. It is whether the credit fits the way you intend to spend your time there.
Elite
Elite is the more substantial bundle, with admission and a higher-value food-and-beverage component. It is designed for visitors who want the observatory visit to include a larger hospitality element, rather than for someone looking only for a quick look at Seattle from above.
The package can make sense for a slower visit or a planned occasion. It makes less sense as an automatic upgrade. More inclusions do not necessarily produce a better ticket if they do not match your itinerary.
| Booking option | What it is designed to provide | Arrival consideration | Best fit |
|---|---|---|---|
| Standard Admission | Observatory access without a bundled food-and-beverage component | The simplest official booking path when issued as a direct mobile ticket | Visitors prioritizing the view, photography, or a short visit |
| Sip & Sights | Observatory access plus a beverage-related inclusion or credit | Confirm the terms of the credit and how it is redeemed | Visitors already planning to use the café or bar |
| Elite | Observatory access plus a larger food-and-beverage component | Check what is included and whether the visit requires additional planning | Visitors looking for a more complete, slower-paced experience |
| Documented reseller voucher | A booking confirmation that may require exchange for an admission ticket | Follow the platform’s box-office or service-desk instructions | Visitors willing to accept an additional processing step after arrival |
| CityPASS C3 | Bundled admission within a multi-attraction product | Present the pass according to the CityPASS and venue instructions | Visitors planning to use several participating Seattle attractions |
The useful price comparison is not just the amount charged for each tier. Consider the part of the package you would otherwise purchase, the time you want to spend at the observatory, and the restrictions attached to the booking.
A ticket with fewer inclusions can be the better purchase when it gives you the exact access you need. A bundled package can be the better purchase when you would have paid for the included food or drink anyway. Neither is automatically superior.
Why CityPASS can be a smarter alternative to individual bookings
CityPASS C3 changes the calculation because it is not simply another way to buy one Sky View Observatory ticket. It is a multi-attraction product intended for an itinerary that includes several participating Seattle attractions.
The pass is most compelling when Sky View Observatory is part of a wider plan. If you are visiting two or three other attractions covered by the pass, the combined-admission structure can be more efficient than buying every entry separately. CityPASS presents the potential for savings of up to 30% on combined admission, depending on how the pass is used and which attractions are selected.
The operational advantage is just as important as the price. A CityPASS mobile pass is presented according to the venue’s admission process, rather than functioning like an independent reseller voucher that must be exchanged for a ticket. For Sky View Observatory, the relevant arrival point is the first-floor atrium and the Guest Services process described for the pass.
That does not mean CityPASS eliminates every possible queue or guarantees immediate elevator boarding. It means the pass can remove one category of uncertainty: the need to convert a reseller voucher into the venue’s admission document when that exchange is required by the platform.
When the pass earns its place
CityPASS is worth considering when:
- Sky View Observatory is one of several attractions on your Seattle itinerary;
- you want one pass rather than multiple individual confirmations;
- the participating attractions match places you already intended to visit;
- the combined cost and validity conditions work for your schedule.
It is less attractive when the observatory is your only planned attraction. Buying a multi-attraction pass solely to avoid comparing individual Sky View Observatory tickets adds another layer of commitment. In that situation, an official Standard ticket may be clearer and easier to manage.
The pass also requires its own reading of the terms. Check the attractions included, the activation rules, the validity period, and any reservation requirements before purchasing. A pass is a system-level solution, but it is still a product with conditions. It should simplify a real itinerary, not replace a quick ticket with a more expensive commitment you will not use.
CityPASS works best when it organizes an itinerary you already have. It is not automatically a better deal for a visitor making only one stop.
Navigating the 73rd-floor arrival process and box office requirements
The arrival sequence is where small differences between ticket types become visible.
The observatory is located on the 73rd floor of the Columbia Center. Visitors reach the building, follow the venue’s directions for the first-floor atrium, and use the relevant ticketing or guest-services process before joining the elevator queue. A direct official mobile ticket should be ready to scan. A CityPASS holder should have the pass available in the format required by the venue. A reseller voucher may require a separate exchange if the platform’s instructions say so.
Do not assume that every booking counter serves the same purpose. A guest-services desk may validate a pass, answer an arrival question, or direct you to the elevator queue. A box office exchange may involve issuing an admission ticket from a voucher. Read the instructions attached to your specific booking rather than relying on another visitor’s description of their arrival.
A practical arrival sequence
1. Have the booking open before entering the building. Keep the QR code, pass, or voucher accessible on your phone. If the platform instructs you to bring a printed document, follow that instruction.
2. Check the wording of the confirmation. Look for terms such as “redeem,” “exchange,” “box office,” or “present at Guest Services.” These words describe the process you will follow.
3. Go to the stated first-floor location. Do not join an elevator line before confirming that your ticket type is ready for admission.
4. Allow staff to direct the next step. Official tickets, CityPASS entries, and reseller vouchers may not use identical procedures.
5. Keep the confirmation until you leave. It may contain the package terms, food-and-beverage details, or instructions needed later in the visit.
This is not bureaucratic detail for its own sake. A booking is successful only when it works at the venue. The booking page is the sales moment; the first-floor atrium is the operational test.
If a platform uses language that is vague about redemption, treat that as a reason to investigate before payment. Look for the official venue name, the exact ticket type, the cancellation terms, and the instructions for arrival. A page that resembles the official website is not necessarily the official booking channel.
The same principle applies to the box office. If the platform documented an exchange requirement, do not expect a voucher to behave like a direct-access ticket. Conversely, do not assume every reseller booking requires the same exchange. The platform’s own confirmation is the relevant source for that booking.
Timing your visit and the 80-second elevator ascent
The elevator ride to the 73rd floor is short—roughly 80 seconds—but that does not define the total visit. The ascent is a fixed part of the experience. The flexible part is how you organize arrival, elevator access, time on the observation level, and any café or bar plans.
Crowd levels vary with the day, weather, holidays, school schedules, special events, and the broader flow of visitors through downtown Seattle. It is not useful to treat one narrow time range as a universal peak period. A weekday afternoon may feel different from a rainy weekend, and a clear evening can attract visitors who would not choose the same time on a cloudy day.
For that reason, the best time to visit Sky View Observatory depends on the result you want.
For quieter viewing and photography
An earlier visit often gives you a better chance of beginning with a less crowded viewing area, especially when you avoid a period that is already busy. It is not a statistical guarantee, and it does not mean the first hour will always be empty. It is simply a sensible way to reduce dependence on the day’s accumulated visitor flow.
Arrive with enough flexibility to complete the ticket check before the light or weather condition you care about. If the purpose of the visit is photography, being physically inside matters more than selecting a theoretical “perfect” slot and arriving too late to settle into the space.
For sunset and changing light
Sunset is popular for an obvious reason: the city, water, and surrounding landscape change quickly as the light falls. That popularity can make the viewing area more competitive. A booking near sunset should include time to arrive, complete any required ticket processing, reach the observation level, and choose a position before the most important light appears.
Do not calculate the plan only from the elevator journey. The 80-second ascent is not the difficult part. The more important variables are the arrival process, the number of visitors already in the venue, and how long you want to remain at the windows before and after sunset.
For a flexible sightseeing stop
A visit in the middle of the day can work well when you are not pursuing a specific light condition. It may fit more naturally between museums, shopping, lunch, or other downtown stops. The trade-off is that you have less control over the crowd pattern and the visibility of distant landmarks.
Weather is a major part of the decision. On a clear day, the view can extend across downtown Seattle, Pioneer Square, Puget Sound, and toward Mount Rainier. On a hazy or cloudy day, the urban geometry and architecture may remain worthwhile even when the distant horizon is obscured.
Your time budget should cover more than the ascent. Allow time for:
- reaching the correct entrance and first-floor service point;
- resolving any ticket or voucher question;
- waiting for elevator access if demand is high;
- photographing and viewing the city from the 73rd floor;
- using the café or bar if your package includes it;
- descending and returning to street level.
If the next appointment is fixed, do not plan the observatory visit so tightly that a busy arrival process would put the rest of the day at risk. A direct mobile ticket can make the process clearer, but it cannot control building access, elevator demand, or the time you choose to spend at the view.
The view is the product: planning for photographic value
Sky View Observatory is not selling a collection of add-ons. The central product is the elevated relationship between Seattle’s streets, buildings, water, and surrounding landscape.
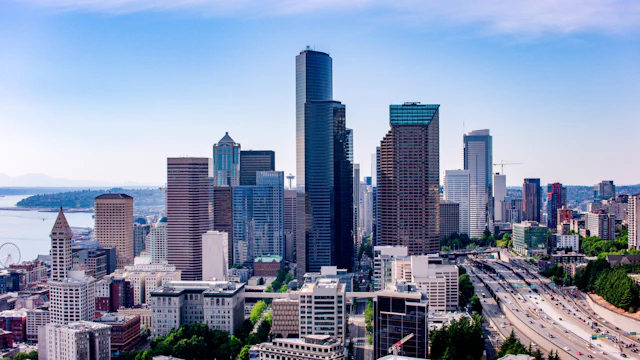
From the 73rd floor, the city reads as a layered composition. Downtown’s dense grid sits below the observation level; Pioneer Square contributes a contrasting historic texture; the water opens the frame outward; and Mount Rainier may appear on the horizon when visibility cooperates. The appeal is not limited to a single landmark. It comes from the way the different scales of the city sit together.
A wide-angle lens can be useful for this kind of scene, particularly when you want to include interior structure and the wider urban view in the same frame. A shorter focal length makes it easier to show the relationship between the Columbia Center’s architecture and the city beyond it, but it also increases the risk of distracting reflections, converging lines, and an untidy foreground.
The glass is part of the technical problem. Reflections, interior lights, fingerprints, and bright clothing can reduce contrast. Move close to the window without pressing equipment against it, switch off unnecessary lights on your side of the camera, and look for an angle that keeps reflections from competing with the skyline.
On a bright day, the exposure difference between sky and buildings can be significant. Bracketing may help if the camera allows it, although a carefully exposed single frame can be the better choice when movement or changing light makes multiple exposures difficult. The priority is not to force an HDR look. It is to preserve the relationship between the bright horizon and the darker urban grid.
A tripod may not be permitted, so plan for hand-held work. Stabilize yourself against the building or window area only where the venue allows it, keep shutter speed high enough for the focal length, and remember that other visitors need the same viewing space. The most considerate photographic setup is often also the most efficient one.
Photography should influence your ticket and timing decision, but it should not turn the visit into a rigid production. If the weather hides Mount Rainier, the city below still offers strong lines, changing density, and architectural contrast. If the viewing area is busy, adapt the composition rather than treating the entire booking as a failure.
Making the booking decision without overpaying
There is no single best Sky View Observatory ticket for every itinerary. The right option depends on how much certainty you need at arrival, whether you want food or drink included, and whether the observatory is part of a broader attraction plan.
Use the following decision path:
1. Start with the official ticket options. Identify the direct admission product and read what it includes.
2. Compare the packages against your real plans. Standard is sensible when the view is the main objective. Sip & Sights or Elite may be useful when you already intend to use the included hospitality component.
3. Treat reseller vouchers as a separate arrival process. If the platform documents a voucher exchange, expect that step and compare it with the clarity of an official mobile ticket.
4. Consider CityPASS only as part of a multi-attraction itinerary. Its value depends on using the wider pass, not merely on visiting Sky View Observatory.
5. Choose timing according to the purpose of the visit. Earlier visits may support quieter viewing; sunset offers changing light but can attract more visitors; daytime is flexible but more dependent on visibility.
6. Read the final confirmation carefully. The confirmation tells you what to present, where to go, and whether the booking is refundable or changeable.
The most expensive mistake is not always paying the highest listed price. It can be paying for a package you will not use, choosing a voucher without understanding the exchange process, or scheduling a tightly timed visit around an arrival procedure you have not checked.
Sky View Observatory tickets are a small purchase within a Seattle itinerary, but the booking choice shapes the first part of the experience. A direct official ticket keeps the transaction simple. A package earns its cost when its inclusions match your plans. CityPASS makes sense when it supports several attractions. A reseller can be workable when its terms are clear, but a voucher that requires exchange should be treated as a different product from immediate admission.
The view is fixed. The booking path is not. Choose the document, package, and arrival process that leave the fewest unanswered questions before you step into the elevator.