Dark hotel room video lighting: from setup to final shot
Standard hotel ceiling fixtures are designed to make a guest find a suitcase, not to make a face look dimensional on camera. Their light falls straight down, digs shadows into eye sockets and under noses, and spreads evenly across every wall in the room.
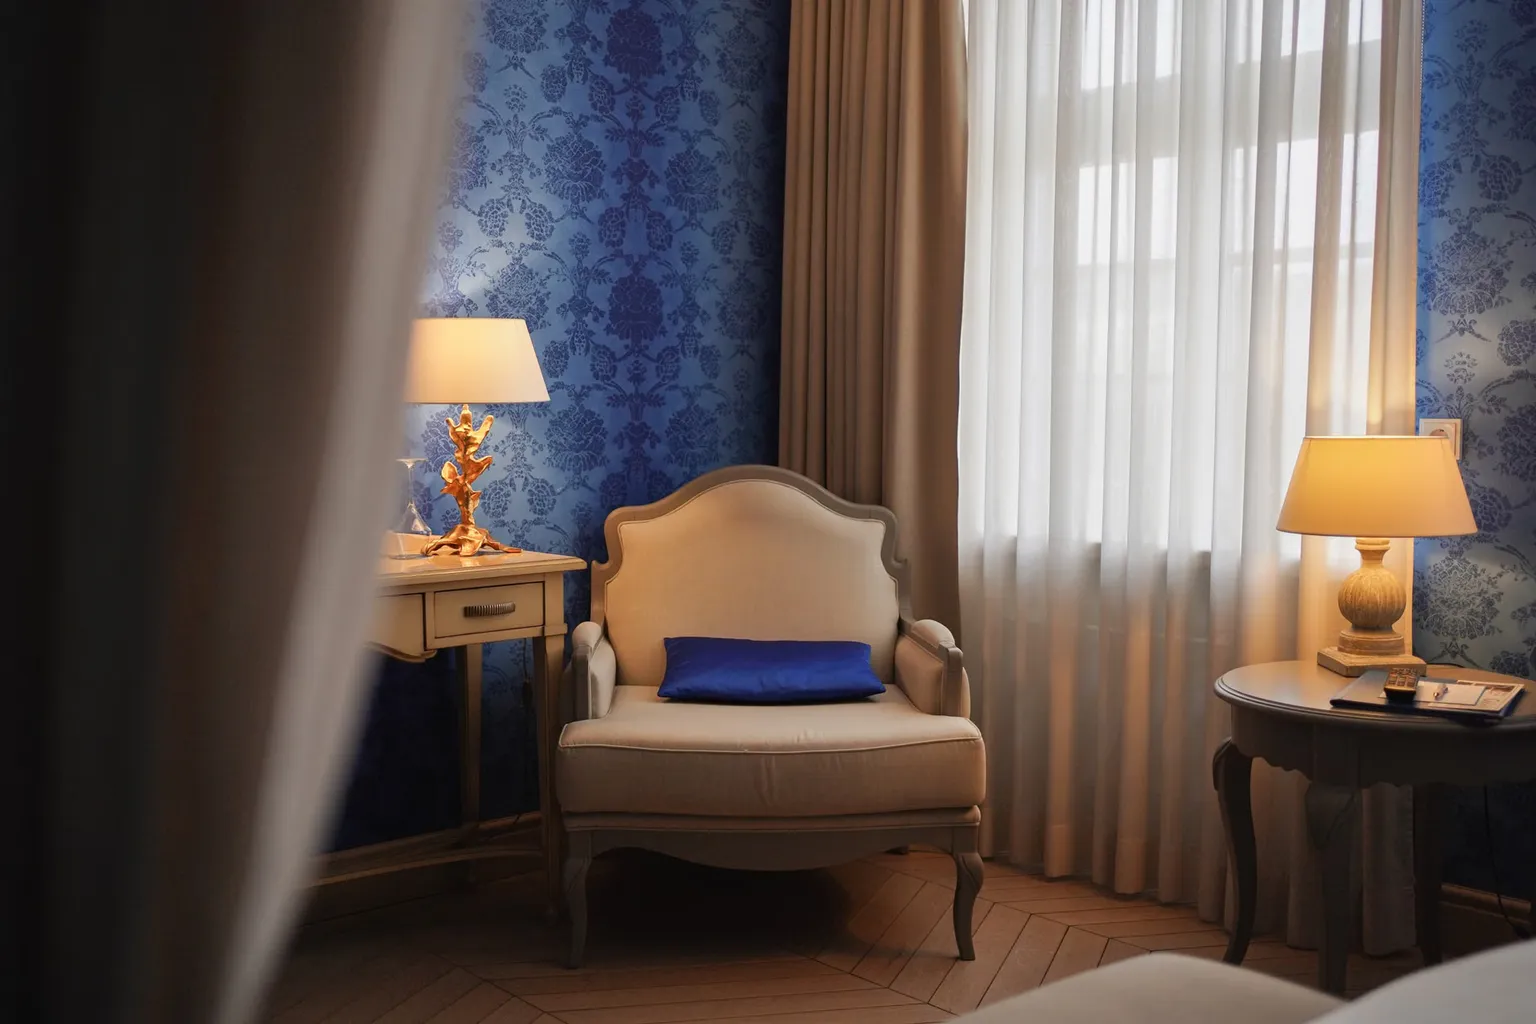
The result is the familiar hotel-video problem: a subject with raccoon eyes against a background that is somehow brighter, flatter, and less interesting than the person speaking.
A reliable hotel room video lighting setup begins by refusing that default. Turn the ceiling fixtures off. Start with the room darker than feels comfortable. Then introduce only the light that earns its place in the frame: a shaped key, controlled practicals, negative fill where the room wants to bounce light back, and a camera exposure that protects the lamps before it protects the wallpaper.
The point is not to make a hotel room look like a soundstage. It is to make a real room retain its atmosphere while giving the camera a clear hierarchy: face first, space second, everything else subordinate.
The Case for Starting in the Dark: Why Overhead Lights Fail
Overhead fixtures fail mostly because of geometry. Light from above creates deep shadows in the eye sockets and directly beneath the nose and chin. At the same time, the broad downward spread illuminates the bed, carpet, walls, desk, and ceiling with roughly equal indifference. There is little direction, so there is little depth.
That is especially damaging in hospitality footage. A room needs to feel inhabitable, not merely visible. If every surface receives the same exposure, the frame describes the dimensions of the room but not its mood. The viewer sees inventory: bed, lamp, chair, artwork. They do not feel invited into the space.
Color inconsistency adds another problem. Hotel bulbs are often replaced one at a time, across multiple maintenance cycles. A bedside lamp may be warm, a sconce may be slightly greener, and the ceiling fixture may use a higher-Kelvin bulb than either. Higher Kelvin values read cooler or bluer on camera, not warmer. A ceiling bulb drifting above 3000K therefore tends to introduce a cooler cast relative to a 2700K bedside lamp; a lower-Kelvin source is the one that reads more amber or orange.
The problem is not that every hotel room contains bad light. It is that the existing light has no coherent visual intention. It has been assembled for housekeeping, guest comfort, energy requirements, and replacement availability. None of those priorities know where your key light should sit.
Turn off the overheads. Build the frame from zero. Every source you bring back should have a job.
Starting in darkness gives you a baseline. Switch on the practicals one by one. Watch what each lamp does to the background. Decide whether it belongs in frame, needs dimming, needs a replacement bulb, or should simply disappear. A lamp in the corner can be a warm point of depth. A ceiling fixture above the talent is usually just a problem with a switch.
There are exceptions. A sculptural pendant, a carefully controlled ceiling cove, or a room with unusually soft indirect lighting may deserve to remain on. But that should be a deliberate choice made while watching the monitor, not an act of hospitality-room obedience.
Matching Color Temperatures: Blending 3000K Practicals with Professional Gear
Most bedside lamps, floor lamps, and sconces in hotel rooms live around the warm end of the spectrum, commonly between 2700K and 3000K. The first task is to establish which warmth is actually present, not which warmth the fixture label promises. A bulb that appears “warm white” to the eye can still sit noticeably apart from the rest of the frame once a camera white balance is locked.
This is where interior lighting for hotel videography becomes less about buying a powerful fixture and more about controlling relationships. The key light, practicals, camera white balance, and any window spill need to agree on what the scene is supposed to feel like.
For a natural evening look, set the camera white balance near the dominant practicals and bring the key close to that temperature. If the lamps read around 3000K, a bi-color key set around 3000K will usually give skin a believable place in the room. The practicals remain warm because they are expected to be warm; the face does not suddenly look lit by a different building.
A 300W-class bi-color spotlight is useful for this work because it can carry a soft modifier without becoming timid in a dark room. Output matters, but quality of light matters more. Look for a fixture with strong color rendering, stable dimming, and a color mode you trust. A high CRI or TLCI figure is helpful, but it is not a substitute for looking at skin, wood finishes, white bedding, and lamp shades through the actual camera.
| Element | Match it closely when | Offset it deliberately when |
|---|---|---|
| Key light | The scene should feel natural, intimate, and believable | You want the subject to separate slightly from a warmer or cooler room |
| Practical lamps | Their shades and pools of light are visible in frame | They function as background accents rather than the scene’s primary illumination |
| Camera white balance | You need consistency across a multi-shot sequence | You are building a distinct warm or cool interpretation of the room |
| Window light | It is part of the composition and cannot be blocked | It is becoming an uncontrolled blue patch in an otherwise warm scene |
A small intentional offset can work. For example, practicals at 2700K and a key around 3200K can create a subtly cooler, cleaner subject against a warmer background. That is a difference in color temperature: 3200K is higher Kelvin and therefore cooler than 2700K. The separation should be visible without becoming theatrical unless the concept calls for it.
What does not change color temperature is minus-green gel. Minus-green corrects a green cast by adding magenta. It is useful when a practical or LED source looks sickly green relative to skin tones or other lights. It does not convert a 2700K lamp into a cooler source.
If the practicals are too warm for the intended mood, there are cleaner options:
- Replace visible bulbs with higher-Kelvin bulbs that still suit the fixture and the hotel’s approved setup.
- Use CTB on a source where the output loss and fixture safety make sense, knowing that CTB shifts a source bluer.
- Dim or remove the offending practical and create the apparent lamp glow with a controlled external source.
- Leave the practical warm but set the camera and key for a cooler overall scene, using the warmth as a deliberate contrast rather than an accident.
The practical rule is simple: correct tint with plus- or minus-green gels; change warmth or coolness with Kelvin adjustment, CTO, CTB, or different bulbs. Treating those controls as interchangeable is how a room ends up looking both blue and green in ways nobody intended.
Watch the lamp shade, not just the bulb
A bulb can be technically matched and still look wrong because the shade is doing its own color work. Cream fabric, smoked glass, brass interiors, patterned shades, and aged plastic all alter the perceived color of the practical. A 3000K source through a yellowed shade will not read like a clean 3000K key.
Before committing to a white balance, record a few seconds with the practicals at their intended brightness. Look at the shade, the pool of light on the wall, and the skin nearest the lamp. The camera sees the combination, not the specification printed on the bulb box.
Managing Contrast in Tight Spaces with Negative Fill
Small hotel rooms are bounce machines. Pale walls, white duvets, framed art behind glass, mirrors, and light carpet all return illumination into the scene. This is pleasant for guests. It is brutal for contrast.
The common mistake when lighting dark hotel rooms for video is to respond to a flat image by adding another fill light. That makes the room brighter, but it rarely makes it better. The shadow side of the face gets lifted, the background gets lifted, and the image starts to lose the thing that made the first setup promising: shape.
Negative fill is the corrective tool. It is simply a black, non-reflective surface placed where you do not want light to return. In a hotel room, that can be black duvetyne on a C-stand, a floppy, black foam core, a curtain, or even a matte black cloth carefully secured outside the frame.
In a small room, the walls are already working as fill lights. Negative fill tells them to stop.
Place negative fill on the side opposite the key. If the key is camera-left, put the black surface camera-right, close enough to the talent that it can intercept the bounce coming off the nearest wall. The exact distance changes with the room, the size of the source, and the subject’s position, but the principle does not: bring the black closer before adding more output from the key.
A useful working sequence is:
1. Light the subject with the key and turn off all unnecessary room sources.
2. Observe the shadow side of the face on a calibrated monitor.
3. Add negative fill opposite the key until the face has shape without losing important detail.
4. Reassess the background, because the same black surface may also reduce spill on a wall or headboard.
5. Only then decide whether a separate fill source is needed.
Negative fill is not synonymous with crushed blacks. The goal is controlled falloff, not a face disappearing into darkness. A hospitality film still needs to feel open and welcoming. The camera should read the subject’s expression; it just does not need to read every pore on both sides of the face at the same brightness.
Black material can also solve a background problem without changing the room permanently. If a pale wall behind the talent is catching too much spill, flag the spill before it reaches the wall or place a black panel just out of frame to reduce the return. This is often more elegant than trying to force the exposure down globally and losing the practicals in the process.
Mirrors are not neutral surfaces
Hotel mirrors are especially deceptive. They may reflect the key, reveal crew movement, double the apparent size of a light source, or return a bright patch that reads as an accidental hotspot. Do not treat them as decoration until you have checked the camera angle.
Sometimes the right move is to use a mirror as a controlled bounce. More often, the right move is to flag it, change the angle of the key, or move the camera by a few inches. In tight rooms, a few inches is not a small adjustment. It can be the difference between a composed frame and a behind-the-scenes reflection nobody can crop out.
Strategic Light Placement: Using Lanterns and Tube Lights for Depth
A hotel room rarely gives you generous floor space or a clean ceiling grid. The kit has to earn its footprint. Lanterns and tube lights work well because they can create softness, separation, and environmental detail without turning the room into a forest of stands.
A lantern modifier produces broad, forgiving light. Used carelessly, it can recreate the same flatness as the ceiling fixture you just switched off. Used with control, it gives a face a soft key while allowing you to flag the spill and preserve some direction.
Place the lantern off to one side rather than directly over the lens. A starting position around 45 degrees from camera-left or camera-right is practical, then adjust height and distance according to the face and the room. Keep it close enough to stay soft. Add a skirt, grid, or flag if it begins washing the background, bouncing into a mirror, or filling the shadow side more than intended.
For a host speaking to camera, the lantern can be the main source. For a two-person conversation, it can cover both people if they are positioned with some discipline rather than scattered across the room. The key is to compose the subjects around the light, not demand that one soft source rescue every possible blocking choice.
Tube lights handle the smaller jobs that make a room feel layered:
- A tube behind and off to the side can create a restrained edge on hair and shoulders, separating the subject from a dark headboard or wall.
- A tube hidden behind a chair, bed, or curtain can create a low pool of texture in the background.
- A tube placed through diffusion or bounced into a wall can act as a gentle fill when negative fill has made the shadow side too severe.
- A tube can motivate a practical that looks good in frame but is too weak to produce the glow the camera needs.
Avoid the reflex to turn every tube into a colored accent. Hospitality video lighting techniques are strongest when the room remains credible. A tiny cool edge can suggest window light. A warm tube hidden behind a headboard can extend the effect of a bedside lamp. Saturated magenta or cyan in a standard guest room usually says “equipment demo” more loudly than “stay here.”
Build depth in layers, not by brightness
A useful dark-room frame generally has three separate light ideas:
1. The subject layer: the shaped key and whatever controlled fill is necessary for expression.
2. The separation layer: a rim, edge, or darker pocket behind the subject that keeps the figure from merging into the room.
3. The environment layer: practicals, motivated wall glow, or a small patch of texture that explains the space without exposing all of it.
The layers should not all be equally bright. The eye needs a reason to move through the image. Let the face lead. Let the practicals support. Let the background fall away where it has nothing useful to say.
If a practical needs to look brighter than it actually is, do not immediately increase its dimmer level until the shade clips. Instead, add a controlled source outside the frame to create a believable pool of illumination nearby. A projector attachment, flagged spotlight, or carefully aimed tube can brighten the wall around the lamp while preserving detail in the shade itself. The lamp appears to carry more presence, but the exposure remains manageable.
Sensor Management: Balancing ISO 800 and Highlight Protection
Dark-room work is not an excuse to expose blindly. The frame may feel moody to the eye while the camera is quietly losing important information in a lamp shade, window, white pillowcase, or polished brass fixture.
Digital sensors do have a hard clipping point: once a photosite is saturated, highlight detail is gone. The graceful or abrupt character of that clipping varies by camera and recording format, but no log profile restores detail that was never recorded. This is why practicals deserve attention before the face is declared “properly exposed.”
ISO 800 is a common working point for many cinema cameras in log modes, but it is not a universal law. Some cameras have different native or dual-native ISO behavior. Others deliver their best highlight latitude at a lower or higher setting. Know the camera’s recommended base ISO for the recording mode you are using, then light and expose from there.
If your camera’s log workflow is built around ISO 800, use it as the stable baseline rather than treating it as a brightness knob. Raising ISO may make the monitor look brighter, but it does not create more light on the subject. It can reduce the amount of highlight headroom available, depending on the camera’s design. Lowering ISO may protect highlights in some modes, but it can also change how much light is required to keep shadows clean.
The practical exposure order is more dependable than a fixed “one stop under” rule:
1. Set the intended white balance manually and lock it.
2. Establish the practicals and protect any lamp shade, window, or reflective surface that needs detail.
3. Shape the key until the subject looks right at the camera’s base ISO.
4. Use waveform, false color, zebras, or the camera’s other reliable exposure tools to confirm the important highlights are not clipping.
5. Check the shadow side of the face at the intended grade, not merely at a bright log-monitor view.
6. Record a test take and review it for flicker, color shift, reflections, and changes caused by dimming.
Auto white balance has no place in a controlled interior setup. A hotel room often contains warm practicals, daylight leaks, and LEDs with mixed tint. Auto WB can chase those changes during a take, especially when a subject moves or a lamp occupies more of the frame. Lock the balance. Make the color decision once. Keep it consistent across coverage.
Log or other flat recording profiles can preserve more flexibility for grading when the camera supports them and the production has a proper post workflow. But log is not a cure for weak lighting. It does not add shape to a flat face, repair a mismatched practical, or remove green contamination from a cheap bulb. It gives the grade more room to interpret a well-controlled capture.
The final shot should still look intentional before the LUT goes on. If it only works after aggressive correction, the lighting setup has not finished its job.
A dark hotel room is not an empty room. It is a room full of uncontrolled sources, reflective surfaces, mixed bulb histories, and very little space to hide mistakes. The answer is not to overpower it. It is to edit it with light: remove the ceiling wash, match or deliberately separate color temperatures, subtract bounce with negative fill, place a few sources with precision, and expose for what must survive the grade.
That is the difference between filming in a hotel room and making the hotel room carry a story.