Hotel interior lighting: three gear paths for crisp footage
Most hotel videos do not look unfinished because the camera is poor. They look unfinished because the room is lit by whatever happened to be switched on when the camera arrived: a ceiling fixture at…
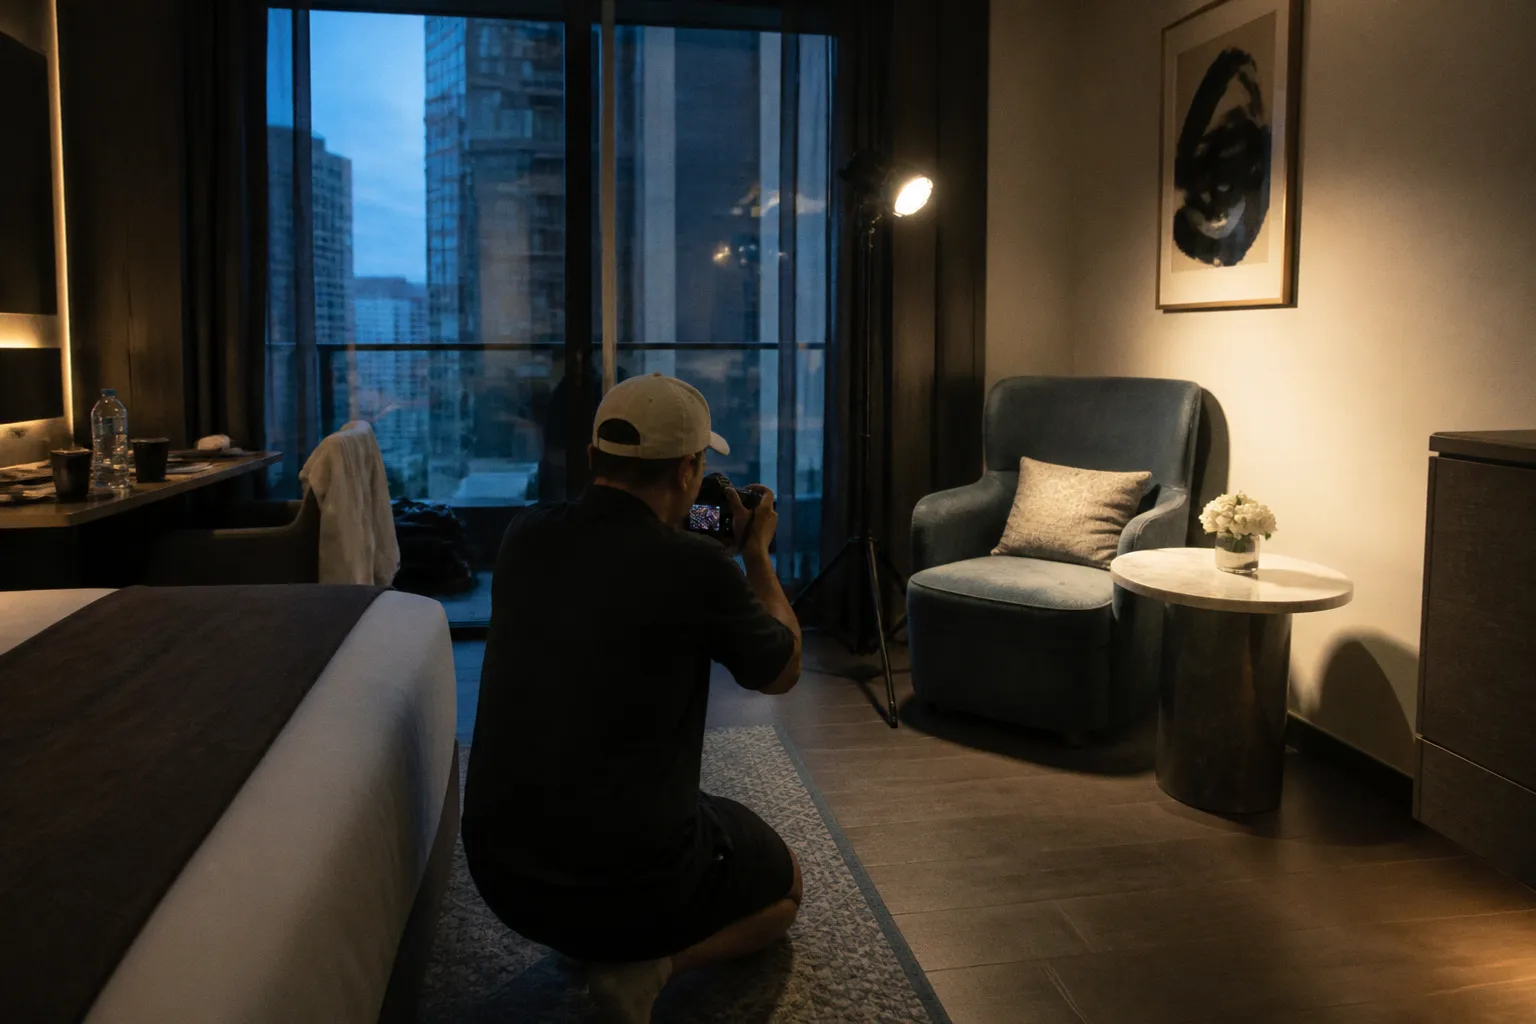
Most hotel videos do not look unfinished because the camera is poor. They look unfinished because the room is lit by whatever happened to be switched on when the camera arrived: a ceiling fixture at one color temperature, bedside lamps at another, and a bright window pushing daylight across the bed. The result is familiar to anyone who has reviewed property footage frame by frame—greenish shadows, orange corners, hard lines under the eyes, and a room that feels flatter on screen than it does in person.
The right hotel interior lighting equipment for video does not need to begin with a truck full of fixtures. It needs to match the scale of the property, the pace of the shoot, and the visual narrative you are trying to create. A pocket LED may be exactly right for a quick room walkthrough. It may also be completely inadequate in a ballroom or lobby. A 300W COB light can transform a suite, but it asks more of your stands, modifiers, power plan, and crew.
I have learned to think about lighting as part of the guest journey. The viewer should notice the texture of the linen, the warmth of the timber, the depth beyond the doorway, and the relationship between the window and the room—not the fact that a light has been placed there. The equipment is only successful when it disappears into the context.
Why ambient hotel lighting rarely survives the camera
Hotel interiors are designed for human eyes, not for a moving image sensor. Guests naturally adapt as they move from a window-lit room to a corridor, then into a warm bathroom. A camera does not make that adjustment gracefully. It records each competing source, and the differences become much more obvious when the footage is edited together.
Overhead ceiling lights are especially troublesome. They create shadows beneath wall art, shelving, furniture edges, and people’s faces. In a room walkthrough, they can make the ceiling look bright while the bed and seating area fall into dull midtones. Their color may also be difficult to control—particularly in properties where decorative lamps, recessed downlights, and daylight are all doing different things.
That does not mean you should turn every practical light off. Hotel lamps are part of the sense of place. A bedside lamp can establish warmth; a pendant can give the dining area character; a row of bathroom globes can support the property’s design language. The problem is allowing those fixtures to become the entire lighting plan.
Before I choose a fixture, I look at four things:
- The size and depth of the space. A compact LED that is beautiful beside a bedside table will not shape a large suite from across the room.
- The available daylight. Windows can give you a generous, soft key—but only if you control exposure and color balance.
- The camera movement. A static detail shot gives you time to finesse one area. A gimbal walk-through requires consistency across the entire route.
- The desired visual style. A moody boutique hotel may benefit from controlled pools of warmth. A family resort may need brighter, cleaner coverage with open shadows.
Good hotel lighting does not make every corner equally bright. It gives the eye a reason to move through the room.
For most interior videography, a fixture with a CRI of 90 or higher is a sensible baseline. Higher color accuracy matters when the frame contains warm wood, pale upholstery, artwork, food, skin tones, and branded textiles together. Daylight-balanced lights around 5500K can work well against window light, but the best temperature is the one that creates alignment between your sources—not the number that sounds most professional on the box.
Path 1: The minimalist travel kit for quick room walkthroughs
The first gear path is built for the person who needs to move quickly: a hotel social media manager filming several rooms in one morning, a freelance creator travelling with carry-on luggage, or a small property producing regular content without a dedicated video crew.
This is where pocket-sized LEDs earn their place. A light such as the LitONES VersaGlow V01 weighs just 126 grams and can be set up in under 30 seconds. That is a meaningful advantage when you are working around a guest arrival, moving between rooms, or trying to capture a detail before the housekeeping team resets the space.
The strength of this kind of light is not raw output. It is speed and proximity. Used close to a bedside arrangement, a flower vase, a welcome amenity, or a bathroom mirror, it can lift a shadow and give a small detail enough shape to hold attention. It is also useful for adding a subtle edge to a presenter or staff member during a short piece to camera.
The working method is simple:
1. Turn off the most unhelpful overhead fixtures rather than automatically switching off every practical.
2. Use the window as your broad ambient source whenever possible.
3. Place the pocket light close to the detail you want to support—just outside the frame, or bounced into a nearby pale wall.
4. Keep the brightness modest. A small light placed too close can produce a bright, artificial patch that feels disconnected from the room.
5. Move the light with the camera if you are filming a short, controlled sequence rather than a long walk-through.
For a small hotel room, the fixture can help create separation around the bed, desk, or amenity station. It can also provide a catchlight in the eyes during a talking-head segment. What it should not be asked to do is illuminate a large lobby, replace a broad key source, or compete with strong outdoor night scenes. The physical scale of the light tells you its intended role.
The other limitation is control. Pocket lights often have less ability to shape the beam, soften the source, or maintain a consistent look across a moving camera. That is perfectly acceptable for quick content, but it becomes visible when you are trying to make a property film feel polished rather than merely documented.
Where this path works best
Choose the minimalist kit when:
- You are filming one or two rooms with limited setup time.
- The property already has attractive daylight and well-designed practical lighting.
- Your content is primarily for social media, short-form room tours, or staff-led updates.
- You are travelling alone and cannot safely manage tall stands or heavier modifiers.
- You need to improve selected details rather than relight the whole interior.
The most effective travel setup is usually not one pocket light used everywhere. It is a small collection of complementary tools: one compact LED, a collapsible reflector, black fabric or a small flag for controlling spill, spare batteries or a power bank, and a basic color reference. The reflector may be less glamorous than another light, but in a pale hotel room it can turn window light into a gentle fill without adding another color source.
Path 2: Mid-range COB LEDs for controlled, accurate interiors
The second path is the most versatile for many independent hotel videographers. Compact COB fixtures provide more useful output than pocket lights, accept softboxes and other modifiers, and give you enough control to shape a room instead of simply brightening it.
The SmallRig RC 60B is a good example of the portability trade-off. The body weighs 650 grams and includes a 3400mAh battery. At full power, the built-in battery provides about 40 minutes of runtime; in Eco Mode, that extends to around 75 minutes. It also supports up to 100W PD Type-C input, allowing charging and use at the same time. For a creator working through several rooms, that flexibility can be more valuable than a higher headline wattage.
The Westcott L60-B takes a similar compact COB approach, with a 60W output and a weight of 1.45 pounds, or approximately 0.66 kilograms. Its stated color accuracy—up to CRI 97, TLCI 98, and SSI 88—makes it well suited to interiors where material and paint color need to remain believable. In hospitality work, that is not a technical footnote. A cream wall that shifts green, or a walnut panel that loses its warmth, changes how the viewer reads the room and the brand behind it.
A COB source is a point light. On its own, it is hard and directional. That is useful when you need to throw light through a doorway, create a controlled highlight, or imitate a shaft of daylight. For flattering room coverage, you will usually want a softbox, lantern, bounce, or diffusion frame.
This is where the softbox-versus-panel question becomes practical rather than theoretical.
| Consideration | COB light with softbox | LED panel |
|---|---|---|
| Quality of light | Soft, directional, and easy to make flattering | Broad and naturally diffused, depending on the panel |
| Control | Strong control with grids, flags, and different modifiers | Often wider and less focused, though some panels offer barn doors |
| Transport | Light body, but modifier adds bulk | Usually a single integrated unit |
| Best use in hotels | Key light through a window, shaped fill, depth in a suite | Fast broad fill, corridor coverage, compact interview setups |
| Common limitation | Requires more setup and stand space | Can spill into areas you want to keep darker |
For a small suite, I often prefer a compact COB outside the window or just inside the room, fitted with a softbox or bounced into a wall. It gives the room a clear direction of light. The viewer can feel where the light is coming from, which makes the image more natural—even when the source is entirely artificial.
A panel can be faster when you need a wide, even lift over a desk or reception counter. It may also be easier to position in a narrow corridor. But broad light is not automatically better light. If it floods the walls, artwork, mirrors, and floor at once, the room can lose its hierarchy.
Building a useful mid-range kit
A practical kit at this level might include:
- One compact bi-color COB fixture.
- A second light for fill or background separation.
- A softbox with a grid for the key source.
- A lightweight stand or boom that can be positioned safely away from guest traffic.
- A reflector or foam board for quiet, controllable fill.
- Black fabric or flags to protect darker areas from spill.
- Extension cables, cable ties, and a small power-management kit.
- A color checker or gray card for maintaining consistency between rooms.
The two-light approach is often enough for a polished hotel sequence. One source shapes the main area near the bed or seating group. The second lifts a darker architectural feature, gives a practical lamp a little support, or creates a gentle edge along a doorway. You do not need to flood the room with fixtures; you need to decide what the viewer should notice first.
Battery operation is particularly useful in properties where cables become a safety issue or where mains access is awkward. However, always distinguish between a fixture that can run from an internal battery and one designed primarily for AC power. Battery duration changes with output, modifier choice, ambient temperature, and whether the unit is charging at the same time. A realistic power plan prevents the familiar mid-shoot compromise: lowering the light just when the best room is ready.
Path 3: High-output fixtures for commercial hotel productions
The third path belongs to larger productions—brand films, launch campaigns, destination films, and multi-room shoots where the lighting must hold up under higher-resolution cameras, longer takes, and close review from a marketing team.
The Zhiyun Molus G300 delivers 300W while weighing 1.56 kilograms. Its color temperature range of 2700K to 6500K and CRI of at least 95 make it capable of working with both warm practicals and cooler daylight. In a suite, a fixture of this class can be pushed through diffusion, bounced into a ceiling, or placed outside a window to create a more convincing daylight direction than a small travel light can manage.
The important distinction is not simply that 300W is “brighter.” It gives you room to make decisions. You can soften the source without losing all of its presence. You can raise the light farther from the subject for a more even spread. You can maintain a useful shutter, aperture, and ISO combination while still shaping the scene with diffusion.
At the high end, fixtures such as the Creamsource Vortex8 RGBW panel move into a different production category. It draws 650W, weighs 15.9 kilograms—35 pounds—without the yoke, and carries an IP65 weather-resistance rating. This is serious commercial equipment. It is not a lightweight solo-travel solution, and treating it as one is a quick way to create a transport and rigging problem.
Its value appears on demanding jobs: large interiors, mixed architectural spaces, controlled exterior work, and productions where color effects or precise RGBW adjustment are part of the creative brief. The IP65 rating can also matter when a shoot involves unpredictable weather or a fixture needs to operate in more exposed conditions, although weather resistance does not remove the need for safe placement, protection of cables, and competent rigging.
For a commercial hotel shoot, the fixture list is only half the plan. You also need to account for:
- The electrical load across the location.
- The height and stability of stands.
- The path of the camera and crew.
- Whether the hotel allows equipment in guest-facing areas.
- Time required to reset a room between angles.
- The continuity of color and brightness across multiple spaces.
- The need to hide, cable, or remove every piece of equipment before guests return.
A practical comparison of the three paths
| Production scale | Typical lighting path | Main advantage | Main compromise |
|---|---|---|---|
| Fast room content and social updates | 126g pocket LED plus reflector | Extremely quick and portable | Limited output and shaping |
| Independent property videography | 60W–100W compact COB fixtures with modifiers | Strong balance of control, color, and portability | Requires stands, modifiers, and battery planning |
| Commercial hotel campaign | 300W COB and high-output production fixtures | Enough power to diffuse, bounce, and cover large spaces | Heavy logistics, higher cost, and greater crew demands |
The most expensive route is not automatically the most suitable. I have seen small properties spend heavily on fixtures and still produce flat footage because the crew had no time to shape the light. Conversely, a compact kit can look remarkably refined when the creator understands the window, turns off the worst overhead source, and gives the room a clear visual priority.
Buy the light that supports your shooting rhythm—not the light that makes the most impressive specification sheet.
The three-point setup inside a hotel room
The classic three-point setup remains useful in hospitality video, but it needs to be adapted to architecture. You are rarely lighting a person against a blank background. You are lighting a person inside a designed environment, and the environment is part of the message.
The key light is the dominant source. It is often placed roughly 45 degrees from the subject and slightly above eye level. For a staff introduction beside a reception desk, that may be a soft COB source just outside the camera axis. For a room tour, the key may be a large source coming through a window or a bounced fixture aimed toward the seating area.
The fill light controls the darkness created by the key. It does not need to eliminate every shadow. In fact, keeping some shadow is often what gives a room dimension. A fill source at around half the intensity of the key is a useful starting point, but the correct level depends on the hotel’s identity. A bright, family-oriented resort may want open shadows; a quiet design hotel may benefit from more contrast.
The backlight, or edge light, separates the subject from the background. In a hotel setting, it can also define a doorway, a plant, a textured wall, or the shoulder line of a presenter. It should be restrained. If the edge becomes a visible halo, the viewer stops reading the room and starts reading the lighting technique.
For a room walkthrough without a presenter, translate the three-point idea into zones:
1. Lead with the architectural feature. Give the bed, view, bath, or living area the strongest visual support.
2. Use fill to preserve detail. Keep dark furniture and corners from collapsing, especially in wide shots.
3. Add separation in the background. A controlled lift behind a chair or along a wall can create depth without making the entire room brighter.
4. Protect the highlights. Sheer curtains, white bedding, and reflective bathroom surfaces can clip quickly.
5. Keep the light direction consistent. If the camera moves from the window side to the opposite side, watch for shadows that suddenly reverse or fixtures appearing in reflections.
Mirrors and glossy surfaces deserve special attention. Bathrooms, wardrobes, polished stone, and framed artwork can reveal your light source, stand, or crew before you notice it on the monitor. A smaller fixture with more precise control may be preferable to a larger soft source if the room contains many reflective surfaces.
Working with natural light without surrendering control
Filming hotel interiors with natural light can produce the most convincing result, particularly when the property has generous windows and a strong relationship to its location. Daylight gives you scale and softness. It also changes constantly.
The first decision is whether to embrace the daylight as the primary source or balance it with artificial light. If the window is the visual reason the room matters—a sea view, a city skyline, a garden terrace—protect it. Expose carefully, then bring the interior up with a controlled source or a bounce. If the view is not central, you may have more freedom to reduce it with sheers, diffusion, or a change in camera angle.
Color alignment matters here. A daylight-balanced fixture around 5500K can sit naturally beside window light, while a warmer source may be useful when you deliberately want to support tungsten practicals. The mistake is allowing three different color stories to compete in the same shot.
I usually make a quick pass through the room before setting any light:
- Identify the brightest window and the direction of its fall.
- Look for surfaces that will reflect a source into the lens.
- Decide which practical lamps contribute to the property’s personality.
- Turn off overhead fixtures that create unhelpful top shadows or a distracting color cast.
- Check the room from the intended camera height, not only from standing eye level.
- Watch how the light changes across the time needed for the shot.
The camera position changes the lighting problem. A room that looks balanced from the doorway may become heavily backlit when the camera moves beside the bed. A gimbal route that crosses the window axis can take you from a warm, inviting exposure to a pale and desaturated one in two seconds.
This is why I prefer to plan the guest journey of the shot before planning the equipment. Where does the viewer enter? What do they discover first? Which texture deserves a close detail? Where should the eye rest at the end? Once those decisions are made, the lighting becomes much more economical.
Color, continuity, and the details that make footage feel expensive
Color accuracy is only useful when it survives the entire workflow. A high-CRI fixture cannot rescue footage that is recorded under mixed sources, corrected inconsistently, and graded differently from room to room.
Set your white balance intentionally rather than leaving it to auto mode. Auto white balance may shift as the camera pans across a warm lamp and a cool window, creating visible changes within one continuous move. Lock the setting, then bring the room into alignment with the lights where possible.
Shoot a short test clip before the full take. Look at:
- White bedding and towels.
- Skin tones, if a person is present.
- Wood, brass, stone, and painted walls.
- The brightest part of the window.
- Reflections in mirrors and glass.
- Practical lamps in the background.
The test should not be judged only on the camera monitor. Check the movement. A source that looks gentle in a static frame may flicker or expose inconsistently as the camera passes through different zones. Keep your frame rate and shutter strategy consistent, and confirm that dimmed fixtures do not introduce flicker.
Continuity is especially important when a hotel film includes multiple rooms. A bedroom, lobby, restaurant, and spa may each have a different lighting identity, but the overall grade should still feel like one property. Record the settings and placement for key shots. Note whether a window was diffused, whether practicals were on, and how much fill was used. These small records save an extraordinary amount of time when a reshoot happens weeks later.
Editing can refine the visual narrative, but it cannot fully repair a room that was lit without a plan. Exposure shifts, color contamination, and hard shadows often become more obvious in the edit because the sequence places shots side by side. Good lighting gives the editor clean choices.
Choosing your path by the job in front of you
If you are producing frequent content for a small hotel, start with portability and repeatability. A pocket LED, reflector, and thoughtful use of natural light may deliver more value than a large fixture that stays in a cupboard because it takes too long to unpack.
If you are filming polished room tours, interviews, and campaign assets, compact COB lights are usually the most balanced investment. The combination of accurate color, bi-color control, battery flexibility, and modifier support gives you enough range to work across bedrooms, corridors, restaurants, and reception areas.
If you are lighting a full commercial production, output and control become more important than minimal weight. A 300W COB can be a remarkably capable central fixture, while high-output panels such as the Vortex8 belong to larger crews and more carefully managed locations. The deciding factor is not how impressive the light is; it is whether your production can use its power safely and creatively.
The before-and-after change is rarely “dark room versus bright room.” It is usually “undirected room versus intentional room.” In the first version, every lamp competes and the camera has nowhere to settle. In the second, the window has a role, the practicals have a role, the shadows are controlled, and the viewer moves naturally from the entry to the bed, from the bed to the view, from the view to the detail that makes the property memorable.
That is the real purpose of hotel interior lighting equipment for video. Not to make a room look brighter than it is, and not to create a glossy image detached from the guest experience. The purpose is to reveal the space with enough clarity, texture, and emotional accuracy that the viewer can imagine moving through it—and can see why this particular room, in this particular place, is worth booking.