Gimbal or tripod for hotel interior video?
The usual advice is simple: use a gimbal for movement, a tripod for static shots. Correct. Also uselessly incomplete.
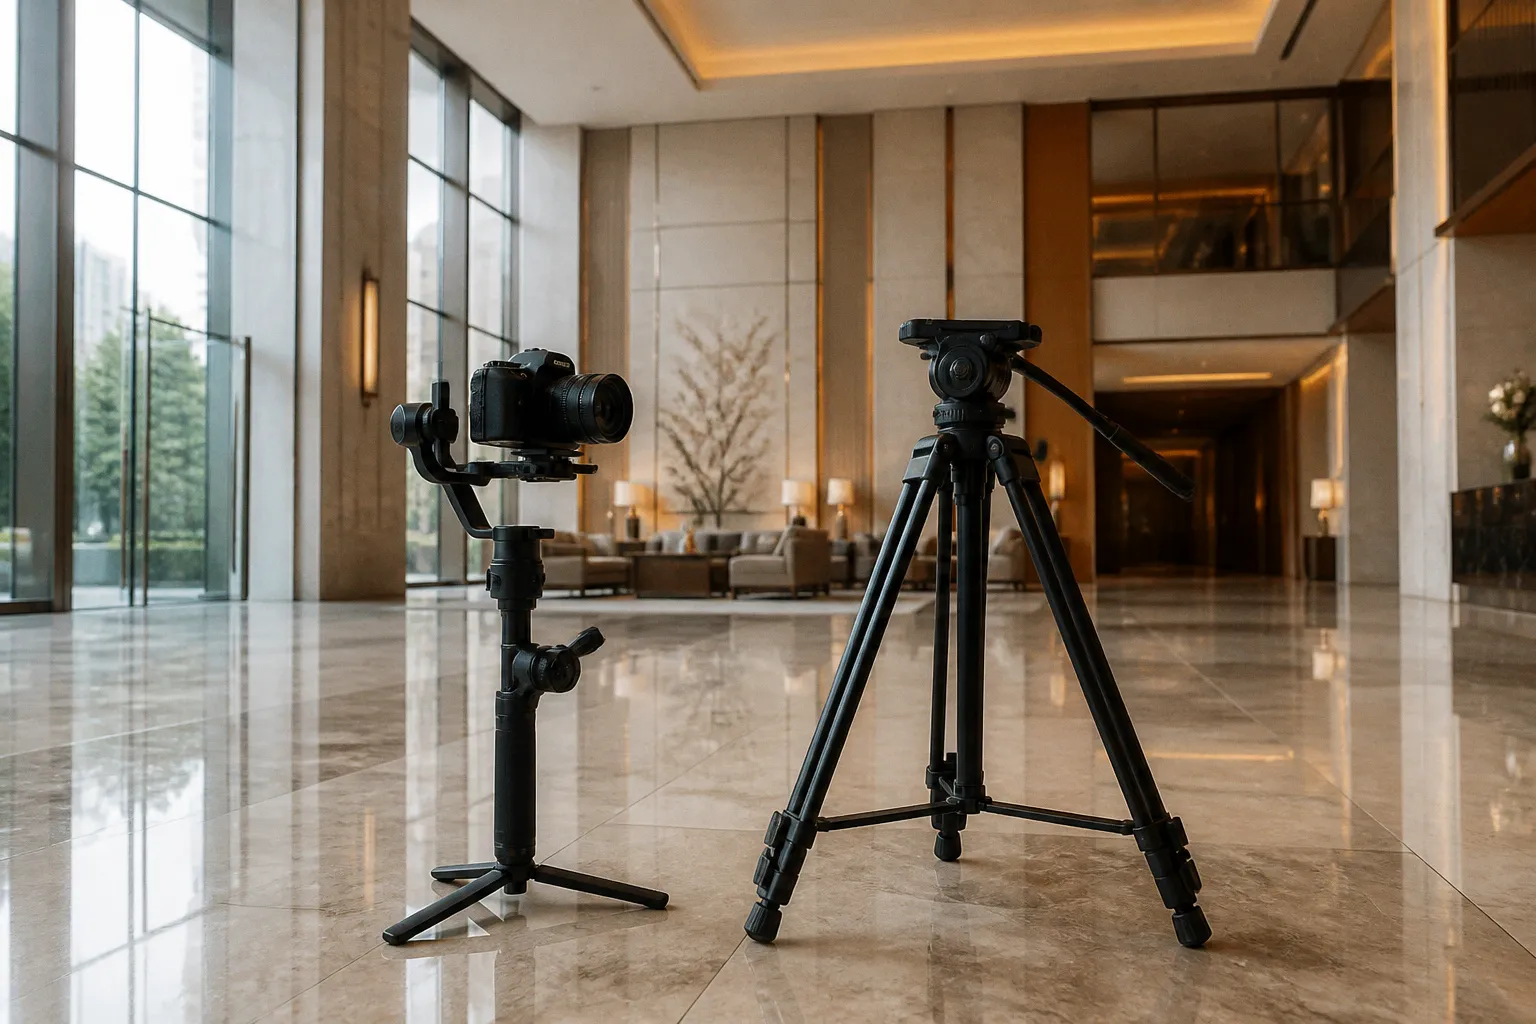
The real question in gimbal vs tripod hotel interior video is not which tool is “more professional.” It is which one protects the shot you are trying to sell. A gimbal can make a suite feel immersive and expensive. A tripod can make the same suite look structurally accurate, calm, and trustworthy. Pick the wrong one and you get either a shaky walkthrough or a perfectly sharp video that moves like a security camera.
Hotels need both. The trick is knowing when to stop chasing motion.
The case for structural integrity: why tripods still matter
Interior video has a visual rule that viewers may never articulate but will notice immediately: vertical lines must stay vertical.
Door frames, wall corners, window mullions, shelving, artwork, and bedposts should not lean inward or outward unless the architecture itself is doing something very strange. Tilt the camera up or down while using a wide lens and the walls begin to converge. The room feels distorted. The viewer may not know why the shot feels cheap, but the algorithm is not the only judge in the room. Human eyes are unforgiving too.
A tripod gives you the control needed to keep the camera level, align the frame precisely, and hold a composition long enough for the room to register. That last part matters. A hotel interior is not just a corridor to pass through. It contains details that drive bookings:
- the depth of the room;
- the relationship between the bed, seating area, and windows;
- the quality of the materials;
- the view beyond the glass;
- the bathroom finish;
- the breakfast spread, cocktail, or amenity that makes the property feel specific rather than generic.
A gimbal is built to move through space. A tripod is built to describe space accurately.
For static detail shots, the tripod wins without much debate. Use it for a close-up of a room-service setup, a coffee machine, folded linens, a bathtub, a fireplace, or a plated dish. These shots benefit from clean edges and zero frame creep. A gimbal may technically hold the camera in place, but its motors are still working. Tiny corrections can create subtle floating or robotic movement, especially when the shot is meant to feel completely still.
The same applies to low-light interiors. Hotel rooms often look best with the practical lighting left on: bedside lamps, wall sconces, pendant fixtures, candles, and indirect lighting. Those scenes can require slower shutter speeds or exposure bracketing. A tripod gives you the stable platform needed to capture multiple exposures and align them in post.
For HDR-style capture, three to five bracketed exposures spaced at two-stop intervals are a common working range. You cannot produce a clean bracketed sequence while casually walking through the room with a gimbal. The floor may be marble, but the laws of motion are still annoyingly present.
Tripod height and alignment
For many interior compositions, a tripod height around five feet—roughly chest level—keeps the camera at a natural viewing height while preserving an accurate sense of space. Go too low and beds, tables, and counters dominate the frame. Go too high and the room starts to look like a floor plan filmed by a drone that got lost indoors.
A leveling base is one of those small pieces of kit that feels unnecessary until you work on uneven hotel flooring. Instead of adjusting three separate legs every time you change position, you can level the camera quickly and keep your setup consistent. That means faster resets between rooms and fewer crooked horizons hidden in the edit.
Tripods also support controlled movement. Add a slider, dolly, or a carefully executed pan and you can create motion without surrendering the geometry of the room. This is especially useful for:
- slow lateral reveals across a bed or seating area;
- a measured pan from a room interior toward a balcony view;
- detail shots of food and drinks;
- product-style footage of bathroom fixtures or spa amenities;
- locked-off transitions between lighting states.
A tripod pan is not automatically elegant. A fast pan is still a fast pan, even if the camera is mounted on something expensive. Keep the movement deliberate, start and finish with a pause, and give the editor handles on both ends of the shot.
A tripod does not make a hotel video boring. Bad pacing does. A gimbal does not make it cinematic. It may just make the walls wobble more expensively.
Immersive storytelling: when to switch to a gimbal
A gimbal earns its place when movement adds information.
That means the camera is not drifting through the property because somebody decided every luxury hotel video needs a floating walk-and-talk. It is moving to connect spaces, reveal a feature, or give the viewer a believable sense of arrival.
Use a gimbal for:
- entering a suite from the hallway;
- moving from the bed toward a balcony or window;
- revealing a bathroom behind a partition;
- following a path from the lobby to reception;
- tracking beside a pool, restaurant, or spa treatment area;
- creating a continuous route through a villa or vacation rental;
- introducing the relationship between indoor and outdoor spaces.
This is where a gimbal beats a tripod instantly. You can create a smooth, immersive walkthrough that places the viewer inside the property rather than in front of a collection of disconnected images.
But smooth is not the same as stable. A gimbal removes high-frequency shake and helps control the camera during movement. It does not eliminate footfall, poor balance, bad lens choices, or an operator who walks like they are late for a flight.
The best gimbal footage usually comes from slower movement than beginners expect. Walk deliberately. Bend your knees slightly. Keep your steps soft. Maintain a consistent pace and avoid sudden acceleration. The camera should feel as if it is being pulled through the room, not carried by someone sprinting toward the minibar.
The gimbal modes that actually matter
For hotel interiors, Tilt Locked Mode is particularly useful. It locks the tilt axis so the camera does not accidentally pitch upward or downward while you move horizontally. That helps preserve level compositions and stops the ceiling from taking over every time you step over a rug.
A standard follow mode can work for reveals where the camera needs to respond to direction changes. But use it with restraint. Too much freedom on the tilt axis turns a composed walkthrough into a series of small, nervous corrections.
The practical goal is simple:
| Shooting goal | Better tool | Why |
|---|---|---|
| Perfectly straight room composition | Tripod | Locks the camera and makes alignment repeatable |
| Smooth walkthrough between spaces | Gimbal | Adds controlled movement and spatial continuity |
| Low-light static interior | Tripod | Supports slower shutter speeds and multi-exposure capture |
| Bed, bathroom, or amenity detail | Tripod or slider | Keeps fine textures sharp and movement precise |
| Wide reveal from room to view | Gimbal | Creates an immersive transition |
| Restaurant or spa tracking shot | Gimbal | Adds energy and follows the guest experience |
| Controlled lateral product shot | Tripod with slider | Produces repeatable motion without motorized float |
| Fast room-to-room coverage | Gimbal, with planned route | Reduces reset time between connected spaces |
The gimbal is the right choice when the movement itself is part of the message. If the movement does not reveal anything, cut it.
Technical settings for professional interior footage
The equipment choice cannot rescue careless settings. A beautifully balanced gimbal with the wrong shutter speed will still produce footage that feels wrong.
For natural motion blur, a 180-degree shutter angle is the reliable starting point. At 24 frames per second, that usually means a shutter speed around 1/50 second. At 30 frames per second, it is commonly around 1/60. The exact setting may shift with lighting and local power frequency, but the principle stays useful: do not crank the shutter speed unnecessarily and then wonder why the walkthrough looks brittle.
Interiors often contain mixed lighting, reflective surfaces, and large windows. Exposure decisions should be made for the room’s visual hierarchy, not just the brightest rectangle in the frame. If the windows are the selling point, protect them. If the room itself is the product, do not let the entire interior collapse into shadow simply to preserve a distant skyline.
Stabilization settings on a tripod
When the camera is locked on a tripod, turn off in-body image stabilization and lens image stabilization. Stabilization systems are designed to detect and correct movement. On a locked camera, that correction can become the movement. The result may be micro-drift, frame creep, or a barely perceptible floating composition that gets worse during a long take.
This is one of those settings that gets ignored because the footage may look fine on the camera screen. Then the editor places a static shot beside a clean architectural frame and the “static” shot quietly wanders. Not ideal.
A tripod setup should also include:
- a properly tightened camera plate;
- a level base or carefully aligned legs;
- a lens wide enough to show the room without forcing extreme perspective;
- manual focus where the scene allows it;
- a controlled aperture that balances depth of field with available light;
- a consistent white balance across adjoining shots.
Auto white balance is particularly risky in hospitality spaces. A warm bedside lamp, cool daylight from a window, and greenish overhead lighting can push the camera into visible shifts during a single take. Lock the white balance when continuity matters. Otherwise, the edit becomes a color-correction rescue mission.
Stabilization settings on a gimbal
On a gimbal, keep IBIS on its normal setting when appropriate, but avoid stacking aggressive stabilization systems on top of each other. Digital stabilization and optical stabilization can interfere with the gimbal’s movement and produce warped edges, robotic corrections, or a strange rubbery effect around door frames and furniture.
This is why “more stabilization” is not a serious technical strategy. It is a panic response.
Balance the camera correctly before shooting. Rebalancing is not optional when changing lenses. A compact gimbal such as the DJI RS 3 Mini can be useful for lighter camera setups, while larger systems such as the DJI RS 4 or Zhiyun Crane 4E are designed for heavier configurations. The model matters less than the payload, balance, operator control, and route through the property.
A gimbal that is technically capable of carrying your camera may still be a poor choice if the setup is front-heavy, the lens extends during focusing, or the battery drops quickly during a long exterior-to-interior sequence. Capability on a product page is not the same as comfort after forty minutes of shooting.
Lens choice changes the stabilization problem
Ultra-wide lenses make rooms look larger. They also make poor movement more obvious.
Every small tilt, roll, or correction becomes exaggerated near the edges of the frame. Door frames bend. Furniture stretches. Walking vibrations travel across a larger field of view. A moderate wide-angle lens can often deliver a more believable sense of space than the widest lens in the bag.
For gimbal walkthroughs, keep the camera close to the intended viewing height and avoid pointing sharply upward. The wider the lens, the more disciplined the operator must be with verticals. On a tripod, a wide lens can be carefully aligned and corrected in post. On a gimbal, a misaligned wall can drift through the entire shot.
The hybrid workflow: balancing motion and static detail
The best answer to gimbal vs tripod hotel interior video is usually not either-or. It is a shot plan that assigns each tool a job.
Start with the tripod. Capture the hero compositions, architectural details, room features, and low-light scenes first. These shots establish the property accurately. They also give the edit breathing room between moving sequences.
Then switch to the gimbal for the connective tissue:
1. Lock the property’s key compositions.
Film the room from its strongest angles with verticals aligned and the camera around chest height. Hold each shot long enough for a viewer to understand what they are looking at.
2. Identify the guest journey.
Decide how a real guest moves through the space: entrance, lobby, room, bathroom, balcony, restaurant, pool, or spa. A gimbal route should follow that logic rather than wander randomly.
3. Capture one clean movement per transition.
Do not film ten nearly identical hallway pushes. Shoot one approach, one reveal, and one exit if the story needs them. More footage is not automatically more coverage. Sometimes it is just more footage to organize.
4. Return to the tripod for detail and atmosphere.
Record the coffee pouring, curtains opening, steam in the spa, a cocktail landing on the bar, or sunlight moving across a textured wall. These moments need precision more than athletic camera movement.
5. Slow the strongest gimbal shots in post.
Reducing speed can soften minor walking vibrations and create a calmer, more elegant feel. Do not slow every clip. That turns the property into a dream sequence and makes the edit feel padded.
6. Grade both systems to match.
Tripod footage may be darker and cleaner. Gimbal footage may contain more movement and exposure variation. Match white balance, contrast, and skin or material tones before adding a stylized look.
The workflow is faster when the tools are assigned in advance. Otherwise, creators tend to carry the gimbal everywhere because it is already powered on. That is how static detail shots become slightly unstable for no strategic reason.
For a one-day hotel production, a useful rhythm is to shoot the room as a still architectural subject first, then as a moving guest experience. Those are different visual products. Treating them as one is how you end up with a video that has plenty of motion but no usable room descriptions.
Common stabilization pitfalls in luxury property videography
Luxury spaces punish sloppy movement because the materials expose it. Glossy stone, glass, polished metal, straight cabinetry, and long corridors all reveal tiny errors.
The “everything must move” mistake
A gimbal shot is not automatically more premium than a locked shot. In fact, luxury branding often relies on restraint. A static frame lets the viewer inspect the finish of a marble vanity or the proportion of a suite. A moving frame asks the viewer to follow the camera.
Use motion when it creates anticipation or reveals a relationship. Use stillness when the material needs to be judged.
Do this: hold a clean composition of the room, then move toward the balcony to reveal the view.
Not that: push forward six feet because the camera is on a gimbal.
Walking too quickly
Fast movement compresses the viewer’s time inside the room. That may work for a social teaser, but it usually weakens a booking-focused property film. Guests need a moment to understand scale, layout, and finish.
Walk slower than feels natural. You can increase speed in post. You cannot recover a rushed reveal without making the room look frantic.
Ignoring vertical lines
The most expensive camera body in the world cannot fix an operator who keeps tilting the horizon. Set the frame before moving. Use the camera’s level tools. Check the edges of the image, not just the subject in the center.
If a doorway is leaning, stop. Rebalance or reframe. Do not assume post-production will magically repair it without cropping, warping, or reducing the usable image.
Leaving every stabilization system switched on
Tripod plus IBIS plus lens IS plus digital stabilization is not a production workflow. It is a pile-up.
On a tripod, disable IBIS and lens stabilization to prevent micro-drift. On a gimbal, use normal IBIS when suitable, but avoid aggressive digital stabilization or OIS combinations that create warping artifacts. Test the exact camera-and-lens combination before the shoot. Stabilization behavior varies, and the first time you discover a problem should not be after filming the hotel’s best suite.
Rebalancing badly after a lens change
Gimbals need balance, not optimism. A lens change alters the center of gravity. Motors then work harder, battery life suffers, and the camera may produce subtle vibration or fail to hold the horizon.
Mark common positions on the gimbal arms if you regularly use the same camera and lenses. That turns setup into a repeatable process instead of a guessing game. Still check the balance. Marks speed things up; they do not replace physics.
Treating the gimbal as a tripod substitute
A gimbal can hold a composition, but it is not the right tool for every static scene. It is less convenient for bracketed exposures, long low-light takes, controlled product detail, and precise repeatability. It also demands more operator attention.
The tripod remains essential for crisp, stable close-ups of amenities, food, beverages, and décor. If the visual goal is sharpness and exact framing, give the camera a stable platform.
Forgetting the edit
A gimbal operator may deliver technically smooth footage that is impossible to cut. The camera enters too quickly, stops too abruptly, or changes direction halfway through the shot. Always record handles: a few seconds of calm before the move and after it ends.
Film the same route from multiple distances if the edit needs options. A wide establishing move, a medium follow, and a static detail can create rhythm. Ten floating wides create a screensaver.
Stabilization is not the story. It is the delivery system. If the viewer notices the delivery system before the room, the shot has failed.
Choosing the right setup for the job
For a hotel room walkthrough, use the gimbal for the entrance and the main reveal, then cut to tripod shots that explain the room. For a luxury suite, let the tripod establish the architecture before the gimbal connects the bedroom, lounge, bathroom, and terrace. For a restaurant, combine slow gimbal tracking around the room with tripod-mounted food and drink details. For a vacation rental, prioritize the route a guest actually follows from arrival to the best feature of the property.
The best stabilizer for real estate video is therefore not a single product. It is a setup matched to the visual promise:
- choose a tripod when geometry, low light, detail, or repeatability leads;
- choose a gimbal when movement reveals layout, access, or atmosphere;
- use a tripod with a slider when you need controlled motion across a detail;
- use a gimbal with Tilt Locked Mode for level walkthroughs;
- slow selected gimbal footage in post instead of forcing every take to look “cinematic” on location.
The decision becomes even clearer when you separate booking content from social content. A short vertical reel may benefit from quick gimbal movement, energetic transitions, and a higher shot count. A booking-page video needs calmer pacing, accurate proportions, readable rooms, and enough static coverage for the property to feel credible.
Do not let the format trick you into abandoning visual accuracy. A vertical video can still have straight walls. A luxury reel can still use a tripod. The algorithm has not outlawed composition.
The practical route
Pack both tools when the property matters. Build the shoot around the tripod’s precision, then use the gimbal to add movement where it earns its place. Keep the camera around chest height for spatially honest compositions. Lock white balance. Use a 180-degree shutter angle as a starting point. Disable stabilization on a locked tripod. Avoid stacking aggressive stabilization on a gimbal. Balance the rig after every lens change.
Then review the footage at full size, not only on the camera monitor. Look for leaning walls, creeping frames, warped edges, inconsistent motion blur, and shots where the camera is doing more work than the property.
The gimbal versus tripod debate survives because it sounds like a gear decision. It is really a communication decision. One tool tells the viewer, “This is the space.” The other says, “This is how it feels to move through it.”
Strong hotel video needs both messages. Use the tripod to make the property believable. Use the gimbal to make it memorable.