Hotel room walkthrough video: a step-by-step filming route
A hotel room walkthrough video can make a compact room feel coherent, generous and easy to book—or make a well-designed space feel cramped before the viewer has even reached the bed. The difference is rarely the camera alone.
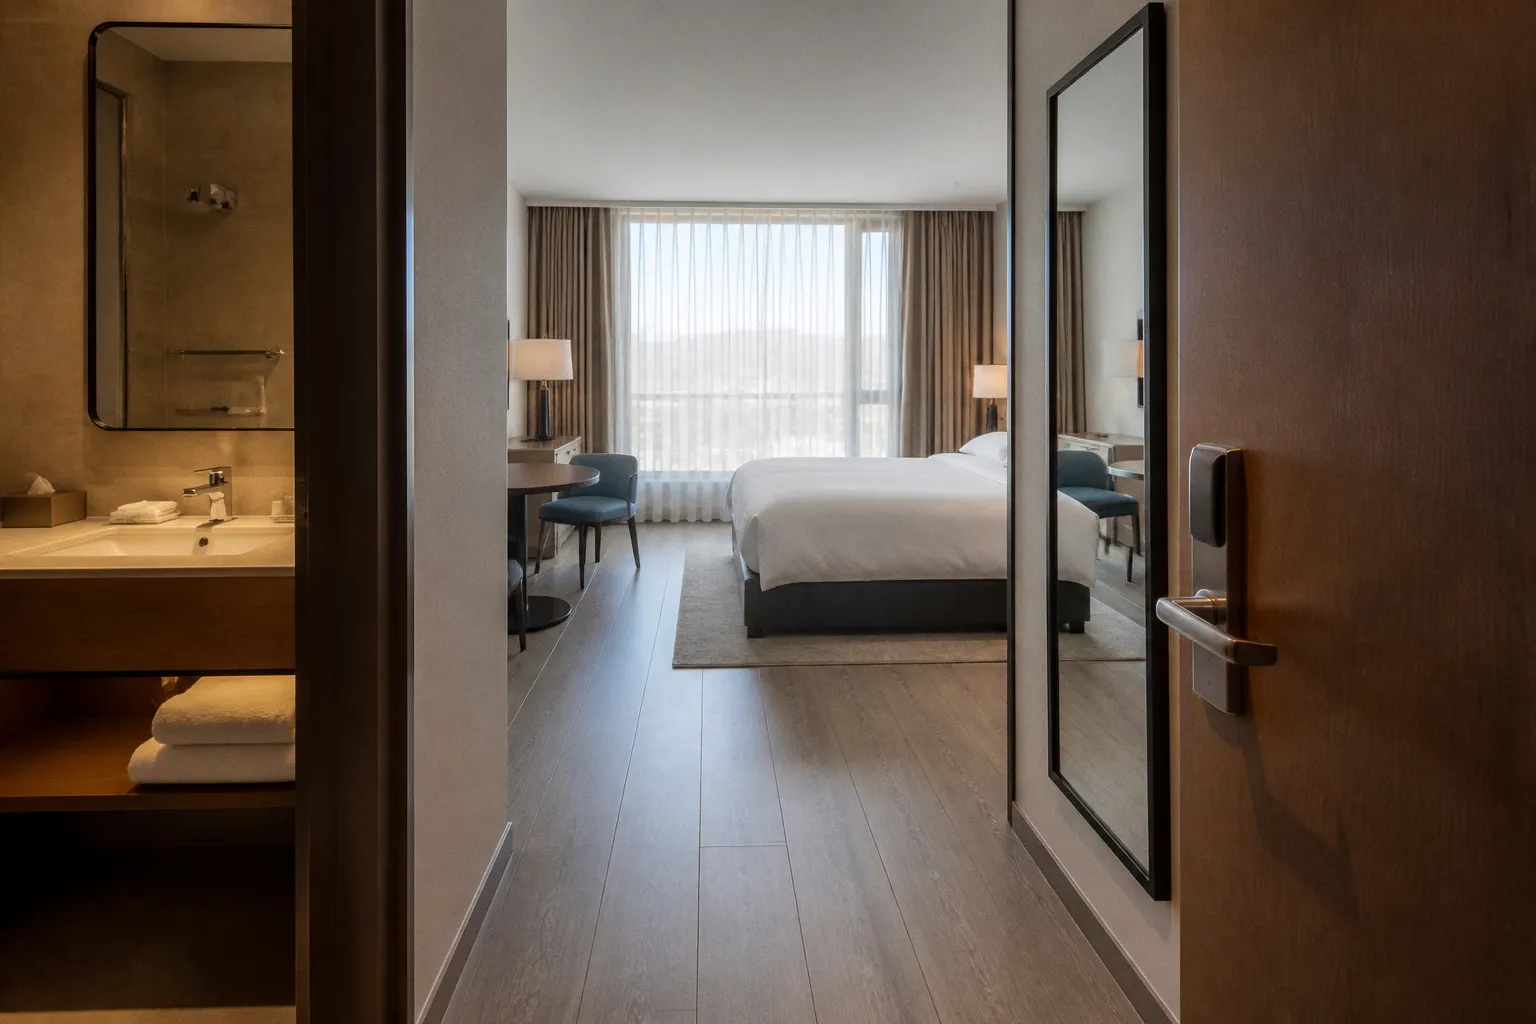
It is usually the route.
If the camera enters through the wrong door, turns toward a secondary feature too early or changes height halfway through the room, the viewer has to reconstruct the layout instead of simply moving through it. That mental work is enough to weaken the impression of the property. A walkthrough should make the room legible: where the guest enters, what they see first, how the spaces connect and which features deserve a closer look.
The most reliable hotel room walkthrough filming sequence is therefore built around spatial logic rather than a fixed collection of shots. The route below works as a starting point, but it should be adapted to the actual layout, the room category and the features the property is selling.
Pre-shoot staging: the foundation of a clean walkthrough
Walk into a hotel room with a camera and the first problems you notice will often have nothing to do with the camera. They will be staging problems: a charger crossing the bedside table, a half-open wardrobe, a bin visible in the bathroom mirror, curtains at different positions, or a bed that looked fine in a still photograph but feels untidy once the camera begins to move.
Motion exposes inconsistency. A static frame can avoid a cable or crop out an awkward corner. A moving camera will eventually pass it, reflect it or draw attention to it. That is why the pre-shoot walkthrough is a technical audit, not a casual glance around the room.
Walk the route at a deliberately slow guest pace before powering on the camera. Look at the room from the height and direction the viewer will experience. If the route includes a turn, stand at the turning point and check what enters the frame before and after the movement. A feature that looks attractive from the doorway may disappear when approached from the bed. A mirror may show the operator or a light stand. A bright window may pull exposure away from the interior just as the camera reaches the room's strongest selling point.
What to stage before filming
The exact staging list depends on the property, but these are the areas most likely to interrupt a clean walkthrough:
- Bathroom: Close the toilet lid, remove personal products, wipe the counter and clean the mirror. Fold or hang towels consistently. Keep bins, cleaning supplies and spare packaging out of the visible route unless they are deliberately part of the room's service story.
- Bed area: Smooth the linens without making the bed look artificially rigid. Align pillows and remove chargers, remotes, phones and other incidental objects. Check the bed skirt or base from the camera's actual angle, not just from directly in front.
- Technology: Hide loose cables and decide whether the television should be off, showing a restrained branded screen or displaying a useful room feature. Make sure thermostats, switches and control panels are visible only when they add information.
- Windows and views: Open curtains consistently and clean glass, handles and nearby frames. Check the view at the planned shooting time. A window can be a major feature, but it can also become a blown-out rectangle that makes the room around it look dark.
- Floors: Remove luggage racks, shoe marks, cleaning carts and stray hangers. Check that the path is clear enough for a gimbal or tripod movement. A beautiful route that requires the operator to step around furniture will rarely look smooth.
- Doors and storage: Decide which doors should be open and which should remain closed. Half-open doors usually look accidental. If a wardrobe, connecting door or service cupboard matters to the guest, include it intentionally and light it well.
- General surfaces: Align minibar items, books, glasses and amenities. The goal is not to make every surface symmetrical. It is to make the frame look considered and to prevent small irregularities from becoming the most noticeable thing in motion.
A clean frame has no accidental staging errors. One distraction can be corrected in the edit; a route full of them usually means the room was never walked before filming.
Staging should also respect the room's category. A luxury suite may benefit from a restrained seating arrangement, a coffee service or a deliberately presented bath setup. A compact standard room does not need every surface filled. Over-styling can make a room feel smaller and can obscure the practical information a guest needs: where the luggage goes, how close the bed is to the desk, whether the bathroom is directly off the entryway.
Take a reference photograph after staging. It gives the team a visual record of the approved setup and makes repeat shoots easier. If several room types are being filmed, save a reference for each one. The goal is consistency within a property, not forcing every room into the same decorative formula.
Defining the natural guest journey: entry to balcony
There is no universal hotel room walkthrough path, because there is no universal hotel room layout. A long, narrow city room, a corner room with two windows and a suite with a separate living area should not be filmed as if they were variations of the same floor plan.
The useful principle is to follow the route a guest would naturally take while forming an initial impression. In many rooms, that means entering through the door, establishing the main sleeping area, moving toward the strongest view or daylight source, then visiting the bathroom and any secondary spaces. In others, the bathroom sits directly beside the entrance, or the balcony is accessed from the living room rather than the bedroom. The camera should acknowledge that logic instead of pretending the room has a standard sequence.
Building the route
Use the following sequence as a planning framework, then adjust it to the room:
1. Establish the entrance. Begin outside the room if the corridor is quiet, well maintained and relevant to the guest experience. Showing the door opening can give the video a natural point of entry. If the corridor is visually weak or noisy, begin just inside the threshold and use the doorway to establish orientation.
2. Give the viewer a first read of the layout. The first movement should reveal enough of the room to answer the basic question: where am I? Avoid immediately pushing into a detail. A slightly wider opening view often does more for clarity than an ambitious reveal.
3. Move toward the primary feature. In many bedrooms this is the bed, but it could be a view, a seating area, a private terrace or a distinctive architectural element. Let the room's actual selling point determine the order.
4. Connect the main area to the view. If the room has a balcony, move toward it from the area where a guest would naturally notice it. Show the relationship between the bed or living space and the window before moving outside. The viewer should understand whether the balcony is an extension of the room or a separate destination.
5. Visit the bathroom at a logical transition. The bathroom can follow the main room, or it can be introduced early when it sits beside the entrance and has a strong design role. Keep the transition clear: open the door fully, enter far enough to establish depth and then show the shower, vanity, bath or other relevant features.
6. Return to secondary spaces only when the layout calls for it. A suite may need a living room, kitchenette, second bedroom or dressing area. Treat these as connected spaces, not a list of unrelated inserts. The viewer should know how each room relates to the one before it.
7. Finish where the property's strongest final impression naturally occurs. This might be the balcony, the view, a well-designed bathroom or a carefully presented amenity. There is no requirement that every walkthrough end with a minibar or a collection of close-ups. The final position should make sense in the room and leave the viewer with the feature the property wants remembered.
The camera should not reverse direction simply to include a shot that was missed. If backtracking is unavoidable, use a doorway, a change in room or a deliberate pause to make the reversal understandable. Otherwise, the viewer may feel that the camera operator is searching rather than guiding.
The guest journey is not a universal formula. It is a way of making the room's own layout readable, one decision point at a time.
For a standard room, the route may be almost linear: entrance, bed, window, bathroom and back toward the entry. For a suite, the route may branch. A useful approach is to identify the main path first and then place secondary spaces at the point where a guest would reasonably choose to visit them. Do not make the viewer wait through a long corridor before showing the feature that gives the suite its identity.
When filming several categories at one property, plan each route separately. A standard room may be sold on efficiency and daylight, while a suite may depend on separation between sleeping and living areas. The resort room tour video camera path should reflect those differences rather than repeating the same choreography with different furniture.
Technical camera settings for consistent interior motion
A good route cannot rescue footage with shifting white balance, unstable exposure or focus that hunts every time the camera passes a bright window. Interior motion is unforgiving because the frame is constantly changing. Settings that seem acceptable in a static shot may become visibly unstable during a slow pan.
The most important decision is to remove as much automation as the lighting allows. The camera should not make a new decision every time it sees a lamp, a mirror or a window.
Resolution and frame rate
1080p remains a practical delivery format for many website and social placements, while 4K gives the editor more room to reframe, stabilise and create shorter crops from the same take. If the final video may be used in several placements, recording in 4K is often the more flexible choice, provided the camera, storage and lighting can support it.
Choose the frame rate for the intended feel and delivery system. Twenty-four frames per second can produce a familiar cinematic cadence; thirty frames per second often feels slightly more immediate and works well for straightforward property presentation. Higher frame rates are useful when slow motion is genuinely needed, but they should not be selected simply because the camera offers them. A walkthrough is usually clearer when movement feels natural rather than hyper-smooth.
Lock the image before the move
- White balance: Lock it before recording. Moving from a warm bedside lamp toward cool daylight can cause an automatic setting to shift in the middle of the shot. Use a manual Kelvin value or a custom reference that suits the dominant light.
- Exposure: Fix exposure before the camera starts moving. Protect bright windows without leaving the room too dark. On a phone, use exposure and focus lock; on a mirrorless camera, manual exposure is usually more predictable.
- Focus: Lock focus when the route has a consistent distance, or use a controlled autofocus mode that will not jump to a mirror, lamp or bright exterior view. Focus hunting is especially distracting during a slow reveal.
- Aperture: A moderate aperture can retain enough depth of field to keep the room readable while avoiding unnecessary softness. The exact choice depends on the lens, available light and the distance between foreground furniture and the background.
- ISO: Keep gain as low as practical. Excessive noise is most visible in shadowed corners, dark wood, bathroom tile and fabric texture. Do not underexpose the entire room merely to keep ISO low; a clean, balanced exposure is more useful than a technically low number.
- Stabilisation: Use a gimbal or tripod and keep the rig level throughout the route. Do not rely on hand-holding alone for marketing footage; the small vertical sway of a free hand becomes obvious the moment the camera tilts toward a feature.
A wide lens is useful, but wider is not automatically better. An ultra-wide lens can make a room appear larger while bending walls, mirrors and furniture at the edges. That distortion may be obvious in a bathroom or around a doorway. A moderate wide-angle view often gives a better balance between spatial information and believable proportions. Test the lens from the planned camera height and turning points, not only from the centre of the room.
| Parameter | Smartphone setup | Mirrorless camera setup |
|---|---|---|
| Recording format | 4K when reframing flexibility is useful | 4K for flexible delivery, or the final delivery format |
| Frame rate | 30fps is a practical default | 24fps or 30fps, selected for the intended feel |
| White balance | Lock after checking mixed light | Manual Kelvin or custom white balance |
| Exposure | Exposure and focus lock | Manual exposure where lighting is stable |
| Focus | Lock or use a restrained tracking mode | Manual or controlled autofocus |
| Stabilisation | Gimbal or tripod, kept level throughout the route | Gimbal, with lens and body stabilisation tested together |
| Lens or field of view | Avoid the widest setting if edges warp | Moderate wide angle tested against vertical lines |
Mixed lighting deserves a decision rather than a reflex. Daylight and warm practical lights can create depth, but they can also produce unpleasant colour shifts across walls and skin tones. If the lamps are part of the room's atmosphere, keep them on and set the camera deliberately. If they make the room look patchy, turn some of them off or correct the colour balance before filming. Consistency is more valuable than having every available light switched on.
Strategic camera placement and movement intervals
A gimbal path for hotel room video should be planned around anchors, not arbitrary distances. An anchor is a position from which the viewer can understand a feature or a relationship: the doorway looking into the room, the bed in relation to the window, the vanity opposite the entrance, or the balcony opening back toward the bedroom.
The distance between anchors depends on the room. In a compact room, moving several metres may take the camera through the entire space. In a suite or a large resort room, the next useful position may be farther away. Treat distance ranges as starting points, not a standard that overrides the floor plan.
Camera height is usually most convincing around standing eye level. The exact height should match the room and the device, but consistency matters more than chasing a particular measurement. If the camera starts near eye level, dips toward the bed and rises again at the window, the viewer feels the operator's body rather than the guest's movement. Keep the horizon stable and vertical lines as straight as the lens allows.
Movement rules that survive different layouts
- Move below a normal walking pace. The viewer needs time to read furniture, doorways and sightlines. A slow, deliberate movement is more useful than a dramatic glide that passes the room's best features too quickly.
- Use straight paths where possible. Straight movement is easier to stabilise and easier for the viewer to understand. Curves can work around a rounded balcony, a staircase or a central architectural feature, but they should respond to the space.
- Pause at meaningful anchors. Stop on the bed, a view, a bath or another major feature long enough for its shape and condition to register. Do not pause merely because the camera has reached a convenient mark.
- Pan from a stable position. If a feature sits to one side of the route, rotate the gimbal on its axis rather than steering the whole body toward it. The viewer keeps their orientation; the room stays readable.
- Plan transitions before they happen. A doorway is a natural moment to change direction, swap framing or move from one room to another. Use those moments to reset eye lines instead of fighting them.
- Walk the route twice if necessary. A first pass at full speed clears the path and reveals staging problems. A second pass, slower and more deliberate, becomes the recorded take. Marketing footage rarely survives on a single attempt.
The interval between anchors matters as much as the anchors themselves. A continuous, unvarying glide across a long suite flattens the space and makes every wall look the same. A route that slows, holds, then moves on gives the eye a chance to compare one zone of the room with the next. Think of the intervals as punctuation, not background noise.
Highlighting room features through controlled pans and zooms
A walkthrough is not a tracking shot around a perimeter. It is a guided tour of a small number of features that actually sell the room. Pans and zooms are the tools that turn a smooth movement into a clear demonstration.
A pan should answer a question the route has already raised. The camera reaches the bed and slowly rotates toward the window: that is a pan that explains the relationship between the two. The camera passes the desk and tilts up to the pendant light above it: that is a pan that gives the feature a frame of reference. A pan with no relationship to the route usually feels like the operator lost interest.
Zooms are harder to use well and easier to misuse. A push-in during the walk can give a feature presence, but only if the surrounding frame still makes sense. A zoom that crops out half the room leaves the viewer disoriented and the feature floating in space. Use zooms sparingly, usually from a stopped position, and only when the closer view reveals something the wide shot could not.
Working with the room's selling points
- The bed. Approach it from the foot or the side rather than head-on. A pan across the linens and pillows tells the viewer more than a static close-up. If the headboard is a feature, hold on it briefly so its material and proportions register.
- The view. Move toward the window from the area a guest would notice it. A pan from the bed toward the window, ending on the exterior, links the two spaces without a hard cut. Bracket the exposure so the view does not blow out and the room does not collapse into shadow.
- The bathroom. Approach the door wide enough to show the threshold, then close the distance inside. Pans should follow the line of the vanity, the bath or the shower enclosure so the layout is legible. A zoom inside a small bathroom often exaggerates distortion more than it adds information.
- The balcony. A short, controlled pan from inside to outside works better than a stop-and-start edit. Show the balcony floor, the railing and the view in a single sweep so the viewer understands the space as one.
- Detail features. A welcome amenity, a coffee setup, a bath product, a piece of technology. These deserve a brief, deliberate pan or a short push-in from a held position. Treat them like punctuation, not the main clause.
A pan should explain a relationship. A zoom should reveal a detail. When either does more than that, the walkthrough loses its sense of place.
The test is simple. If the route is followed exactly as planned and every pan and zoom removed, the walkthrough should still feel coherent. The pans and zooms are there to sharpen what the route already shows, not to carry the whole video.
Hotel walkthrough video tutorial: a practical shot checklist
A hotel tutorial is easier to film when the route is translated into a simple checklist. The checklist should support the room's layout, not force the operator to collect identical shots in every property.
A simple hotel tutorial workflow
1. Scout the room without filming. Walk from the entrance to the final feature and note sightlines, reflections, exposure changes, tight turns and obstacles.
2. Choose the opening frame. Decide whether the viewer should enter from the corridor or begin just inside the room. The first frame should establish orientation immediately.
3. Mark the main anchors. Identify the entrance, primary feature, window or balcony, bathroom and any connected secondary space. These are the points where the camera may pause or change direction.
4. Record the continuous route. Keep the camera at a consistent height, move slowly and avoid unnecessary changes in direction. Let each space lead naturally to the next.
5. Capture feature details after the main take. Film the bed, view, bathroom fittings, amenities and technology as separate supporting shots when a closer view adds useful information.
6. Review the take in sequence. Check that the room remains understandable without explanation. Look for exposure shifts, focus changes, warped verticals, reflections of the crew and moments where the camera moves too quickly.
7. Repeat only the weak sections. If the main route works, do not rebuild the entire video for one missed detail. Reshoot the affected anchor or supporting shot while preserving the established direction and camera height.
This hotel video tips checklist also helps when the same property is filmed for several formats. Keep the main route spatially clear, then create additional vertical or shorter edits from separately recorded details. A strong tutorial hotel video should feel like a guided visit first and a collection of promotional shots second.
Closing the route
A well-built hotel room walkthrough filming sequence is mostly a series of decisions made before the camera moves. Where to enter, where to pause, where to pan, where to stop. The route, the staging and the settings are not three separate tasks; they are the same task seen from different angles. When they are aligned, the footage feels calm, the room feels generous and the property reads the way it was meant to be read. When they are not, no amount of colour grading or stabilisation in the edit will put the room back together.