Hotel video gimbal checklist: settings to verify before filming
A gimbal does not make bad preparation look professional. It makes bad preparation glide slowly through the lobby.
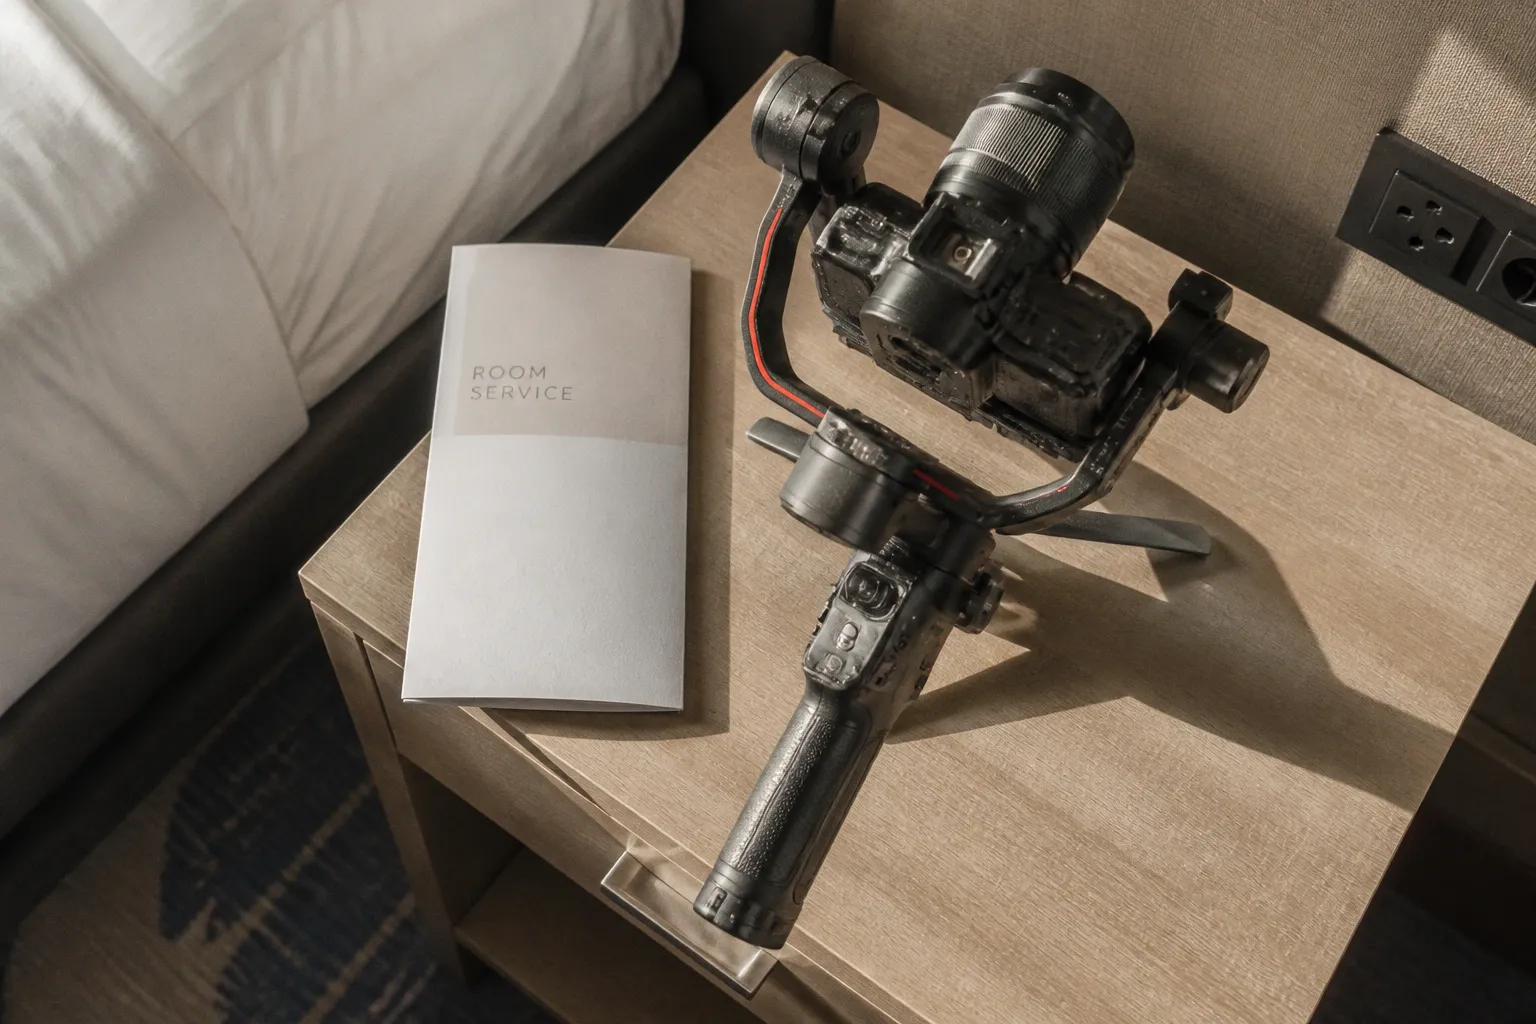
The most common hotel video mistake is powering on the gimbal, waiting for the motors to wake up, and walking straight into the first room. That skips the part that actually protects your footage: balancing the camera, lens, and every accessory as one complete payload. If the rig is front-heavy, side-heavy, or constantly fighting its own weight, you get motor strain, battery drain, micro-jitter, and a horizon that quietly starts leaning into the furniture.
Use this hotel video gimbal setup checklist before filming. It is not glamorous. It is the difference between a smooth hotel video walkthrough and several hours of footage that looks like it was shot on a shopping trolley.
Start with the complete camera payload
The gimbal must be balanced with the camera exactly as it will be used on location. Not approximately. Not with the lens cap still on because you plan to remove it later. Exactly.
Mount the final lens, insert the camera battery, load the memory card, attach the CPL filter, and fit any monitor, transmitter, cage, handle, follow-focus motor, or other accessory that will stay on the rig. If you change the payload after balancing, you have changed the centre of gravity. The gimbal does not care that the new filter weighs almost nothing. Its motors care where that weight sits.
This is where many hotel shoots go stale before the first take. A videographer balances a stripped-down camera in the car park, then adds a filter and monitor inside the suite. The rig technically turns on. The footage technically records. The motors are now working against a setup they were never tuned to support.
Before switching on the gimbal, run through the physical preparation:
- Camera battery inserted and fully charged.
- Memory card loaded.
- Final lens mounted.
- Lens cap removed.
- CPL filter or other filter attached.
- Cage, monitor, transmitter, handle, and cables fitted.
- Camera plate tightened firmly.
- All cables routed so they do not pull against an axis.
- Lens zoom or focal length set to the position used for filming.
That last point matters on zoom lenses. Changing focal length can shift the balance, particularly when the lens barrel extends. Rebalance after the change. The goal is not to win a speedrun. The goal is to stop the motor from correcting a problem you created with one casual twist of the zoom ring.
The gimbal is not a magic wand. It is a motorized balancing system, and it performs best when you stop asking it to compensate for sloppy setup.
Balance all three axes before powering on
A hotel video gimbal setup checklist is only useful if it includes all three axes: tilt, roll, and pan. Balancing one or two is not enough. A rig can look fine from the front and still be mechanically wrong when the camera tilts, rolls, or rotates through a room reveal.
Tilt balance
Tilt balance controls how the camera behaves when the lens points up or down. This is critical in hotel interiors because walkthroughs constantly move between floor finishes, beds, windows, ceilings, pendant lights, and architectural details.
With the gimbal powered off, position the camera so the lens points roughly forward. Release the tilt axis and see whether the camera drops or rises. Adjust the tilt arm until the camera stays in position rather than trying to swing toward the lens or camera body.
Then check the tilt range. Point the lens upward and downward through the range you expect to use. The camera should not suddenly fall toward one end. If it does, the balance is not finished.
A front-heavy camera forces the tilt motor to hold the lens up continuously. That can create:
- Increased motor load.
- Faster battery drain.
- Small vibrations during movement.
- Noisy or inconsistent motor response.
- More visible jitter during slow tilts.
Slow movements expose these problems. Hotel video is mostly slow movement. There is nowhere for a bad balance to hide.
Roll balance
The roll axis controls whether the horizon stays level. In a property video, a crooked horizon is not a minor technical flaw. It makes walls, door frames, countertops, and window lines look wrong immediately. Viewers may not identify the cause, but they feel that something is off.
With the camera level and powered off, release the roll axis. If one side drops, slide the camera or adjust the roll arm until it remains level. Check again after rotating the camera into the position you will actually use.
The test is simple: the camera should not constantly fall toward the left or right when the gimbal is not powered. If it does, do not expect electronic stabilization to clean it up. The motor will be spending its time correcting gravity instead of smoothing your movement.
Pan balance
Pan balance is easy to neglect because it is less visually obvious during a stationary test. It still matters. The pan axis supports the camera as you turn, orbit, and move through connected spaces.
Release the pan axis and rotate the gimbal through its usable range. The camera should not swing aggressively in one direction or require the motor to fight a persistent imbalance. If you are filming a suite with a wide reveal from bed to balcony, that pan movement will be repeated constantly. A small mechanical error becomes a repeated visual twitch.
The correct sequence is mechanical, not digital:
1. Balance tilt with the gimbal powered off.
2. Balance roll with the final camera position established.
3. Balance pan through the range of motion you will use.
4. Repeat the checks after adding or moving accessories.
5. Power on only when the camera remains stable without motor assistance.
That is the foundation of gimbal stabilization for hotel video. Skip it and every later setting becomes damage control.
Accessory integration: the small stuff that ruins big shots
Reflective hotel surfaces are a special kind of trouble. Polished floors, glass doors, mirrors, dark windows, lacquered furniture, and glossy bathroom finishes can turn a clean walkthrough into a collection of distracting reflections.
A Circular Polarizing filter can help reduce reflections on surfaces such as polished hardwood floors, windows, and glass doors. But the filter needs to be attached before balancing. Add it later and you have changed the payload. Again: tiny accessory, real consequence.
The CPL also needs to be rotated for the scene. Its effect depends on the angle of the light and the reflective surface. It is not a universal “make everything cinematic” button. Over-rotating or using it without checking the image can darken parts of the frame or reduce the look you were trying to preserve. Use it to control reflections, not to make every interior look aggressively processed.
Cables create another avoidable problem. A monitor cable that catches during a pan can produce a sudden drag that looks like a motor glitch. A transmitter cable resting against the roll arm can introduce friction. A loose strap can tap the camera or brush across the frame. Mounting the accessory is only half the job. Secure the route.
For camera gear prep for real estate video and hospitality shoots, think in terms of movement rather than equipment lists. Ask:
- What will touch the gimbal during a full pan?
- Does the cable pull when the camera tilts down?
- Does the monitor block the balance adjustment?
- Does the lens hood interfere with the tilt arm?
- Does the camera shift when the plate is tightened?
- Will the filter remain in the same position for the entire shot?
A rig can be perfectly balanced in a static position and still fail during the move. Test the actual move before the guest arrives, the sun changes, or the room is reset for the next take.
Motor calibration comes after balancing, not before
Auto-tuning is useful. It is not a replacement for physical balance.
Once tilt, roll, and pan are balanced, run the gimbal’s motor auto-tuning or calibration process. The purpose is to adjust motor strength and torque for the actual camera-and-lens payload. A small mirrorless setup and a heavier cinema body should not be treated as the same load. Neither should a bare camera and a camera with a cage, monitor, filter, and transmitter.
The exact motor strength values vary by gimbal, camera, lens, and accessories. There is no universal number worth copying from a random setup video. If someone promises that one setting works for every hotel camera rig, they are selling confidence, not accuracy.
After auto-tuning, listen and watch:
- The motors should hold the camera without aggressive buzzing.
- The camera should remain stable when you stop walking.
- The gimbal should not visibly tremble while stationary.
- The motor arms should not become unusually hot.
- The camera should respond consistently when you change direction.
- The battery should not drain suspiciously quickly during basic operation.
A little motor sound is not automatically a failure. A constant strained buzz, visible vibration, or repeated correction is a reason to power down and rebalance. Do not try to solve a mechanical issue by turning motor strength up until the gimbal sounds angry.
A practical diagnostic table
| Symptom during setup or movement | Likely issue | Better response |
|---|---|---|
| Camera slowly falls forward or backward | Tilt axis is not balanced | Reposition the camera on the tilt arm |
| Horizon leans to one side | Roll axis imbalance or incorrect calibration | Rebalance roll, then run calibration |
| Gimbal buzzes while stationary | Motor is compensating for imbalance or excessive torque | Power down, rebalance, and retune |
| Sudden jerk during a pan | Cable drag, poor pan balance, or overly fast follow response | Check cable routing and reduce follow speed |
| Battery drains unusually fast | Motors are constantly working against the payload | Rebalance all axes and retune motor strength |
| Camera shakes during a slow reveal | Poor balance, aggressive motor response, or operator movement | Recheck balance, soften settings, and improve walking technique |
| Smooth image but crooked verticals | Horizon or camera alignment problem | Correct roll balance and confirm camera mounting |
Do not use post-production as a substitute for this stage. Stabilization software can help with small imperfections, but it cannot turn a poorly balanced rig into a reliable one without compromises in cropping, sharpness, or image movement.
Choose the follow mode for the shot, not for your ego
There is no prize for using the most responsive gimbal mode. Hotel walkthroughs rarely need a camera that whips toward every movement. They need controlled movement that reveals the space without making the viewer feel trapped inside a washing machine.
For interior reveal shots and orbits, Pan-Follow mode is commonly the practical choice. The camera follows horizontal rotation while remaining more controlled vertically. That works well when moving around a bed, dining table, seating area, or architectural feature and allowing the room to open gradually.
For straight push-ins and pull-outs, axis locks are often more appropriate. Hold the trigger to lock the relevant axes and keep the camera pointed in a consistent direction while you move through a doorway or toward a feature. This is useful for:
- Entering a suite and holding the bed centred.
- Moving down a hallway toward a window.
- Pulling away from a bathtub to reveal the full bathroom.
- Exiting a room while keeping an architectural line stable.
- Sliding past furniture without the camera chasing every hand movement.
The best gimbal mode is the one that makes the camera obey the room. If the lens keeps drifting toward your walking direction, the setting is too loose. If the camera refuses to follow a deliberate reveal, it is too locked. Test the mode with the actual shot path.
Set follow speed to slow or smooth
Slow or smooth follow responses reduce erratic pan and tilt reactions. That matters in hospitality video because the camera is usually showing space, not performing. A room needs time to read. Fast response settings can make a small wrist movement look like a sudden editorial decision.
Start with slow to medium follow speed and medium deadband settings. The exact menu names differ between gimbals, but the logic is consistent:
- Lower follow speed: calmer camera response and fewer sudden corrections.
- Moderate deadband: small operator movements are ignored until they become intentional.
- Smooth acceleration and deceleration: fewer visible starts and stops.
- Appropriate follow direction: the camera follows the move you actually want, not every twitch.
Do this, not that:
- Do use slow follow for a bedroom reveal. Do not let the camera snap toward every shoulder movement.
- Do use a lock during a straight push-in. Do not rely on your wrists to maintain a perfect heading for ten metres.
- Do test a 180-degree turn before filming the full suite. Do not discover the follow limits halfway through a one-take lobby move.
- Do keep the horizon stable. Do not add speed just because a faster setting feels more responsive in the hand.
- Do match the gimbal mode to the shot. Do not use one preset for every room and call it a workflow.
A hotel walkthrough should feel calm because the space is calm—not because the editor spent an afternoon wrestling a shaky timeline.
Camera settings still control the motion
A gimbal can smooth the camera path, but camera settings determine how that movement appears. The biggest basic control is shutter speed.
Align shutter speed with the 180-degree rule to maintain natural motion blur. For example, when recording at 30 frames per second, a shutter speed of 1/60 second produces motion that generally looks more natural during horizontal pans, vertical tilts, and forward movement.
A shutter speed that is too fast can make the footage look harsh and staccato. This is especially visible when the camera moves across strong architectural lines: door frames, bed edges, wall panels, and window mullions. The gimbal may be moving smoothly, but the image will still look nervous.
The camera settings are part of the gimbal setup, not an unrelated menu exercise. Before recording, confirm:
- Frame rate is set for the deliverable.
- Shutter speed matches the chosen frame rate and intended motion blur.
- ISO is controlled for the room’s available light.
- White balance will remain consistent across the walkthrough.
- Exposure is not changing aggressively as the camera moves past windows.
- The lens and focal length suit the room rather than exaggerating it beyond credibility.
- Recording format and card capacity are ready for the planned takes.
There is no single focal length that works for every hotel room. A compact bathroom, a narrow corridor, and a large suite present different spatial problems. Go too wide and the room starts to look stretched, with furniture pushed toward the edges and architectural lines bending into a sales pitch. Go too tight and the space loses context.
The useful question is not “What is the widest lens I own?” It is “What focal length shows the room honestly while preserving the movement?” Booking psychology starts with trust. A video that makes a small room look enormous may generate a click and lose credibility when the guest arrives.
Walking technique: the gimbal cannot fix your vertical bounce
A three-axis gimbal stabilizes tilt, roll, and pan. It does not completely eliminate the vertical movement created by your footsteps. That up-and-down bounce comes from the operator, not from a missing menu setting.
Use controlled movement:
- Bend the knees slightly.
- Keep your steps shorter than usual.
- Move heel-to-toe where the surface allows it.
- Keep both hands on the gimbal when the shot requires precision.
- Avoid sudden stops; decelerate gradually.
- Keep the camera path deliberate rather than drifting around the room.
- Practise the move before recording the take that matters.
The so-called ninja walk can reduce vertical bounce, but it is technique, not magic. Post-production stabilization may help with minor movement, but it can crop the frame and create warped edges, particularly around doorways, mirrors, and straight architectural lines.
This is also why hotel interiors punish improvisation. A low table, rug edge, polished floor, or narrow doorway changes your footwork. Plan the route. Know where you will turn. Do not walk backward through an unfamiliar suite while staring at the monitor and hoping the furniture respects your creative process.
The pre-roll check that prevents expensive reshoots
Before the full walkthrough, record a short test move in the exact room. It does not need to be a finished shot. It needs to expose failure while the room is still available.
Run a push-in, a pan, a tilt, and a turn through the intended route. Review the footage at normal speed and inspect the parts that usually give away weak setup:
- Vertical door frames.
- Horizontal window lines.
- Reflections in glass and polished surfaces.
- The moment you start moving.
- The moment you stop.
- Any change in direction.
- The transition from a dark room toward a bright window.
- Footstep bounce during the longest move.
- Motor vibration during a slow hold.
If the test footage looks wrong, fix the setup rather than rationalizing it. The algorithm will not reward your attachment to a bad take. Viewers will not admire the amount of expensive gear involved. They will simply scroll.
A clean pre-roll routine looks like this:
1. Mount the complete payload.
2. Balance tilt, roll, and pan with the gimbal off.
3. Check movement through the usable range.
4. Run motor auto-tuning.
5. Select Pan-Follow for reveals or axis locks for straight moves.
6. Set slow or smooth follow responses with moderate deadband.
7. Confirm frame rate and shutter speed.
8. Perform a short test move.
9. Review the horizon, reflections, starts, stops, and footstep bounce.
10. Rebalance or retune before filming the final sequence.
That is the actual hotel video gimbal setup checklist. Not a list of brand presets. Not a cinematic LUT. Not another accessory purchase.
Make the room look effortless by doing the work first
Smooth hotel video walkthroughs are built before the camera starts moving. Balance all three axes with the final accessories attached. Calibrate the motors only after the physical setup is correct. Choose a follow mode that matches the shot. Keep responses slow enough to preserve the room’s geometry. Set shutter speed for natural motion blur. Then walk like the floor is part of the shot—which, inconveniently, it is.
The modern attention economy is already crowded with polished property footage. More gear will not create traction if the footage jitters, leans, bounces, or makes a room look suspiciously larger than it is.
Set up the gimbal properly. Record the test move. Fix the problem before the reshoot becomes someone else’s problem.