Musée national des beaux-arts du Québec: video prep checklist
Most content creators arrive at the Musée national des beaux-arts du Québec with the wrong assumption: that the hard part is getting inside. It is not.
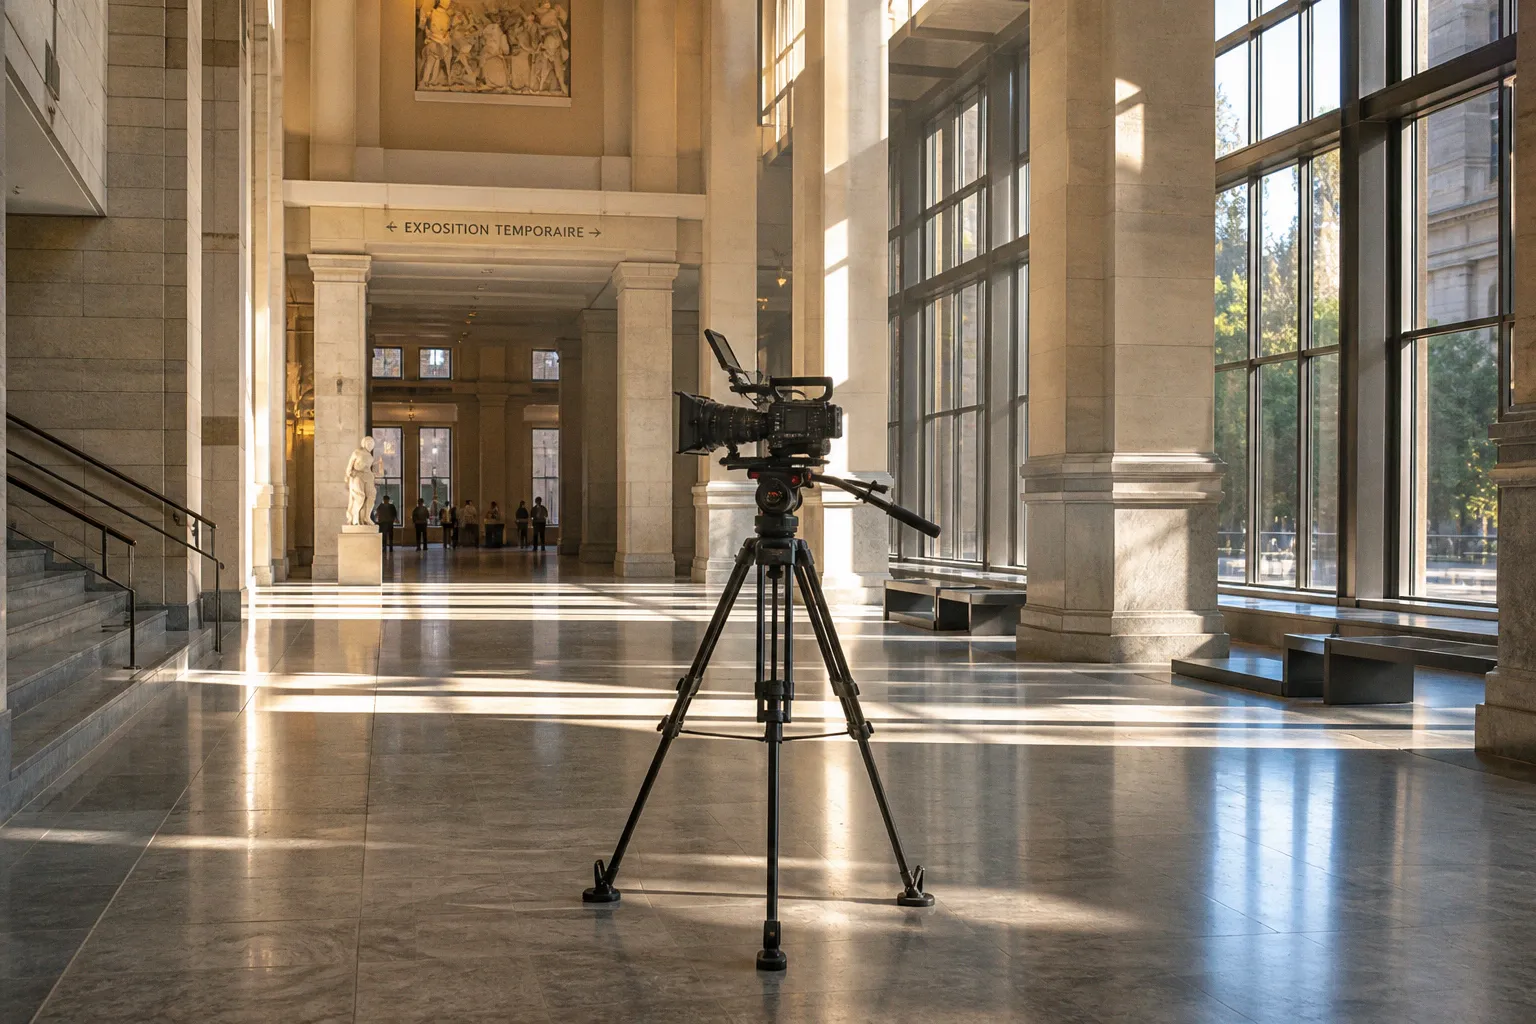
The hard part is arriving with a setup that fits the museum’s visitor rules, knowing which shots can be captured casually, and recognising the point at which a small content session becomes a commercial production.
Tickets and prices
- Official ticket — Ages 65+fromCAD21
Prices checked on August 19, 2026 · current price on the partner page.
Prices are indicative and may change — confirm the price and availability on the partner page.
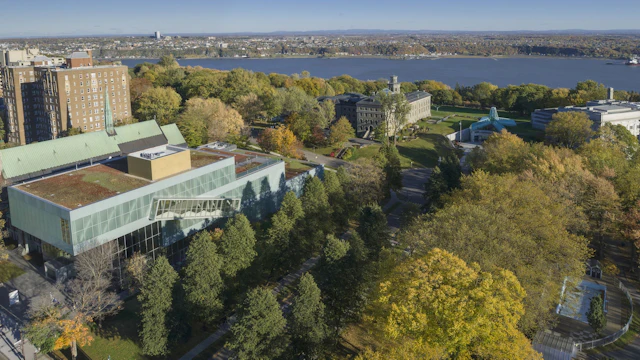
Partner link — GetYourGuide ticketsThe Pierre Lassonde Pavilion gives you plenty to work with before you even enter a gallery: sweeping glass walls, strong architectural lines, the Plains of Abraham as a backdrop, and changing daylight that can make simple handheld footage feel considered rather than improvised. Inside, however, the museum is still an operating cultural institution, not a blank studio. Flash, support equipment, bags, artwork protection, visitor circulation and staff instructions all shape what you can realistically capture.
That distinction matters whether you are making a hotel reel, a destination video, a travel feature or a short social edit. A phone and a small handheld camera may be appropriate for a personal visit, while the same shoot can require advance approval once it involves a tripod, a crew, commercial intent or a more substantial setup.
This checklist covers the practical route: how to buy tickets to the Musée national des beaux-arts du Québec, how to prepare for handheld filming, when to discuss an MNBAQ filming permit, how to source better artwork images for the edit, and how to make arrival and parking less disruptive.
Buy online when possible, pack light, and decide before arrival whether you are visiting or producing.
Buy tickets online and skip the ticket-line tax
The most efficient place to start is the museum’s online ticketing flow. Buying Musée national des beaux-arts du Québec tickets in advance can save up to $3 per ticket and gives visitors direct access to the exhibition galleries rather than requiring an additional stop at the ticket counter.
That is useful even for a solo creator. It becomes more useful when two or three people are arriving together with cameras, coats and a limited shooting window. The less time spent sorting admission at the entrance, the more time remains for establishing shots, exterior footage and the gallery material that can actually support the final edit.
Different ticket variants may be available through the museum’s standard booking channels, including options that bundle a self-guided audio tour. Check what is included before selecting an option: a ticket that works well for a visitor following the permanent collection is not automatically the best fit for a short production schedule built around one exhibition or one pavilion.
There is also a practical reason not to buy more tickets than you need. Standard admission tickets are non-refundable. The museum may accommodate date changes in exceptional circumstances, but that should be confirmed with staff rather than assumed. Treat the booking as a commitment to a specific visit, especially if the ticket is being purchased for a small team.
Before completing the purchase, make sure the production calendar and the visit date agree on a few basic points:
- Whether the intended exhibition is open on the day of the visit.
- Whether everyone who needs to enter has a ticket.
- Whether the selected ticket includes the areas you plan to film.
- Whether the visit is personal, editorial, promotional or commercial in purpose.
- Whether the museum has announced any temporary access restrictions or changes to the public route.
If your content is being made for a hotel, tourism company, venue, agency or other paying client, online admission does not replace a conversation about filming permissions. Ticketing solves entry. It does not automatically authorise a commercial setup.
Give yourself time at the entrance
A creator’s schedule often treats the museum entrance as dead time. That is a mistake. It is where you can put away the equipment you do not need, confirm the route, use the cloakroom and ask a staff member about any uncertainty before the camera is rolling.
If your plan involves only discreet handheld footage, say so plainly. If you have a wireless microphone, a phone cage, a stabiliser, a compact light or another accessory that could be interpreted as production equipment, ask whether it is acceptable before entering the galleries. The museum’s published guidance may not answer every equipment-specific question, and an advance confirmation is safer than relying on an assumption made at the door.
Navigating gallery rules for handheld content creation
The basic visitor rules are straightforward, but they have consequences for how you plan a shot. You cannot simply recreate a studio workflow in the middle of a public gallery.
No flash
Flash photography is not permitted. Turn off automatic flash before you enter, rather than waiting for the first low-light room to trigger it. This applies to phones as well as dedicated cameras.
A phone set to automatic mode can activate its flash without much warning when the light level changes. That is exactly the kind of small technical problem that becomes a visible interruption in a quiet gallery. Check the camera app, disable the flash, and keep the setting under control for the whole visit.
The restriction also affects how you should expose footage. Do not plan to rescue every dark shot with an on-camera light. Instead, use the available ambient light, move deliberately between brighter areas, and accept that some rooms will work better as atmosphere than as close-up coverage.
No tripods or monopods during a standard public visit
Tripods and monopods are not allowed during standard public visits. That removes the most obvious solution for locked-off architecture shots, but it does not make useful coverage impossible.
Use the building’s natural geometry. Door frames, walls, benches and gallery thresholds can provide visual stability without turning the visit into a camera installation. Keep movements slow, avoid unnecessary reframing and capture several seconds before and after the action you want. A stable handheld shot with clean handles is far more useful in the edit than a complicated move that attracts attention or blocks circulation.
If you need a tripod, a monopod, a larger support system or a controlled camera position, treat that as a production question and contact the museum before the visit. Do not bring the equipment into the building hoping that a public ticket will cover it.
Keep at least one metre from artworks
Maintain a distance of at least one metre from artworks. This affects more than safety; it changes your composition.
The close, dramatic angle that works for social media can easily place a camera too near a canvas, sculpture or installation. Work from the wider context instead. Show the artwork in relation to the room, the wall, the floor and the people moving through the space. If a detail is essential to the edit, plan to source an approved digital image rather than trying to force a close-up in the gallery.
The distance rule is also a reminder to watch the rear of the camera, not only the image on the screen. A creator concentrating on framing can drift backwards into another visitor or forward toward an artwork. Keep one person responsible for awareness when you are working with more than one camera operator.
Keep bulky items out of exhibition galleries
Backpacks, umbrellas and large bags may need to be placed in the cloakroom rather than carried into the exhibition galleries. For a content visit, this is a reason to simplify the loadout before arrival.
A practical handheld kit might include:
- A phone or compact camera with a charged battery.
- A spare battery or power bank, if permitted and safely stored.
- A small lens cloth.
- A compact microphone only after confirming that the museum allows the specific setup.
- A small sling or camera bag that can be managed without brushing walls or visitors.
- A short shot list stored on the phone rather than printed on loose paper.
Avoid carrying a full production bag if you only need a camera and a few accessories. Every extra item creates another decision at the entrance and another object to manage in a crowded room.
Audio equipment needs advance confirmation
The earlier version of this advice was too definite about external microphones. The museum’s available guidance does not establish a blanket rule that an external mic is generally fine for personal use, nor does it fully resolve every variation of handheld audio equipment.
That means the responsible approach is simple: ask MNBAQ staff in advance about the exact microphone and camera configuration you plan to use. A phone with a small cable-connected mic, a wireless transmitter clipped to a presenter, a camera-mounted shotgun mic and a visibly professional audio setup may not be treated identically.
The same applies to recording spoken content. A short piece to camera, an interview, a voice-led walkthrough and silent B-roll raise different practical questions about sound, visitor privacy and how much space the setup occupies. Confirm the rules before the shoot, and have a silent visual plan ready if the answer is more restrictive than expected.
| Gear decision | Standard visit | Commercial or controlled production |
|---|---|---|
| Phone or handheld camera | May be suitable when used discreetly and without flash; confirm any uncertainty with staff | Include the camera plan in the advance production conversation |
| Tripod or monopod | Not allowed during a standard public visit | Discuss availability and approval as part of the permit or venue rental |
| Flash or on-camera light | Not permitted | Do not assume production approval overrides artwork-protection rules |
| External microphone | Policy and equipment-specific restrictions should be confirmed with MNBAQ staff in advance | Confirm the microphone, recording method and crew footprint before booking |
| Backpack or large bag | Use the cloakroom where required | Ask about cases, staging and storage for the approved production |
| Gimbal or stabiliser | Confirm in advance; size and movement may affect circulation | Include it in the equipment list submitted to the venue |
Do not assume opening-hours filming is approved
Handheld filming during public opening hours is another area where certainty can create problems. The museum may distinguish between a visitor recording a small amount of personal content and a creator conducting a professional-looking or commercially motivated session, but the exact boundary can depend on the equipment, behaviour, crew size and intended use.
Do not present that boundary as settled without checking with MNBAQ. If you intend to vlog, record a presenter, capture repeated takes, use a wireless audio system or film content for a brand, contact the museum before the visit. Explain what you will bring, how many people will be involved, whether the camera will move through galleries and where the final content will appear.
Staff may need to clarify whether your plan is acceptable during public hours or whether it should be handled as a formal production. That conversation is not a formality. It determines whether you should arrive with a minimal handheld setup or book a separate filming arrangement.
When the equipment starts to look like a production, ask before you shoot. The museum’s answer is part of your production plan.
Securing permits for professional commercial production
The practical dividing line is not always the size of the camera. It is the purpose and footprint of the work.
A small camera can still be used for a commercial campaign. A large camera can still be used by a visitor for personal documentation. In both cases, the museum needs enough information to understand what is happening in its galleries and whether the activity affects artworks, staff or other visitors.
Commercial filming and photo shoots at MNBAQ require a dedicated venue rental, booked at least one month in advance. These shoots take place when the museum is closed to the public. The starting rate is $500 plus tax for a two-hour block, but that is only the entry point. The final cost may depend on the area used, equipment, crew requirements, timing and other production details.
If you are producing a hotel brand video, a tourism campaign, a sponsored destination piece or another commercial edit that uses the museum as a location, contact the venue team before purchasing a stack of ordinary visitor tickets. Describe the project honestly. Include:
- The name of the client and the intended use of the footage.
- The proposed date and time.
- The number of crew members and on-camera participants.
- The cameras, lenses, tripods, stabilisers, microphones and lighting equipment.
- The galleries, pavilion areas or exterior spaces you want to use.
- Whether you need interviews, repeated takes, voice recording or controlled sound.
- Whether artwork will appear as a central subject or simply as part of the environment.
- The delivery format and distribution channels, if relevant.
This information lets the museum tell you what kind of approval is required. It also prevents a common production failure: booking a visit around one visual idea and discovering at the entrance that the equipment or intended use needs a different arrangement.
Why after-hours production is worth the planning
A formal shoot costs more than a casual visit, but it buys control. You are not trying to keep a tripod out of the path of visitors, waiting for a gallery to clear or asking a presenter to repeat a line because someone crossed the frame.
After-hours access can also make the museum feel larger on screen. The Pierre Lassonde Pavilion glass facade, interior transitions and gallery entrances are easier to compose when the camera team is not constantly adjusting for foot traffic. The crew can establish a camera position, repeat a movement and capture clean ambient sound without treating every visitor as an obstacle.
That does not mean every shot needs a permit. It means you should match the production method to the brief. If the client needs controlled movement, presenter-led narration, multiple takes, a crew footprint or a recognisable commercial finish, plan for a formal booking rather than trying to make a public visit behave like a studio day.
Do not arrive with a cinema-grade setup during opening hours and hope the situation will resolve itself. If staff ask you to stop, the shoot is already compromised. The time spent explaining an unapproved setup is time you will not recover, and the footage may no longer match the schedule you promised a client.
Sourcing high-resolution digital assets for your edit
Museum footage often fails at the point where the editor needs a clean artwork close-up. The handheld shot looked acceptable on the camera screen, but the finished version reveals reflections, uneven exposure, visitors crossing the frame and focus hunting across protective glass.
There is a better way to build that part of the sequence. MNBAQ provides high-resolution digital artwork files for publication, media and video use. The available pricing tiers run roughly $50 per file for personal use, $100 per file for corporate or media use and $85 per file for a newly shot studio image.
Confirm the current price, licence and delivery conditions with the museum before ordering. The key point is not simply resolution. It is matching the file and permission to the way the image will appear in the final edit.
Use the supplied digital asset for the artwork detail, then use your own footage for the surrounding experience:
1. Open with the exterior or architectural approach.
2. Move into a wider gallery shot that establishes scale and atmosphere.
3. Cut to the museum-supplied artwork image for a clean detail.
4. Return to handheld footage showing the room, the visitor route or the relationship between the work and the building.
5. Close with a transition through a doorway, stairwell or pavilion area.
This combination is stronger than trying to force every visual requirement through a visitor’s phone. Your footage gives the edit a sense of place. The supplied file gives the artwork the clarity and consistency it needs.
It also reduces rights confusion. Keep a record of which file was supplied, what use was approved and how the artwork will be credited if the museum requires a credit line. Do not assume that permission to visit or permission to record the building automatically covers every later use of a high-resolution reproduction.
Plan the asset request before the shoot
Do not wait until the edit is nearly finished to ask for artwork files. Make a preliminary list while the concept is still flexible:
- Which works are central to the story?
- Which pieces need a clean detail rather than a room shot?
- Is the content personal, editorial, educational or commercial?
- Will the artwork appear in a paid campaign, on a website, in social media or across several channels?
- Does the client need a vertical and horizontal version?
- Will the image be used briefly as an insert or remain on screen long enough to carry information?
The answers affect what you request. A file suitable for a personal project may not cover corporate or media use. A single social cut may require a different workflow from a campaign that will be adapted across several platforms.
Planning your arrival: parking and facility access
MNBAQ is located at 179 Grande Allée Ouest, inside the Pierre Lassonde Pavilion on the Plains of Abraham. The address is easy to enter into a navigation app. The production question is what you need to do once you arrive.
On-site parking is listed at $6 for the first hour, $3 for each additional hour, up to a daily maximum of $20, taxes included. Overnight parking is listed at $14 from 5 p.m. to 8 a.m. These rates make a short visit manageable, but a full-day public visit followed by a separately arranged evening production should be budgeted as two different time commitments rather than treated as one casual stop.
Parking is only one part of the arrival plan. Build in time to move equipment, use the cloakroom, find the correct entrance and clarify filming questions. A creator who arrives exactly at the intended shooting time is already behind.
Keep the arrival plan simple
A few operational choices make the day easier:
- Use one compact working bag. Carry only the equipment you have confirmed and expect to use.
- Leave nonessential cases in the vehicle when appropriate. Large cases create storage and circulation questions; do not assume they can accompany you into the galleries.
- Allow time for the cloakroom. Coats, umbrellas and larger bags can slow down the entrance process if the whole crew arrives at once.
- Separate public-visit equipment from production equipment. If a formal shoot is booked, bring the approved kit. If it is a standard visit, do not pack as though you have already secured a permit.
- Have an overflow parking plan. A multi-car crew should not assume every vehicle will find a convenient on-site space.
- Check the day’s closing time. Public hours, exhibition access and your own schedule need to align.
- Keep a buffer before departure. Staff questions, a crowded cloakroom or one missed exterior shot can easily extend a supposedly short visit.
If the plan includes exterior footage, capture it early rather than leaving it until the end. Daylight, weather and visitor movement are less predictable than the inside route. The building’s glass facade and the relationship between the pavilion and the Plains of Abraham are among the strongest establishing visuals, so they should not be treated as disposable filler.
What to actually shoot during your visit
A good museum shot list is not a catalogue of every room. It is a sequence that gives the viewer a reason to move through the space.
Architecture first
Start with the Pierre Lassonde Pavilion. Look for the glass facade, reflections, stone surfaces, thresholds and the way the building sits against the Plains of Abraham. These shots establish location quickly and can carry the opening seconds of a hotel or destination video without requiring a presenter.
Handheld movement works well here when it is deliberate. Walk at a consistent pace, keep the horizon under control and let architectural lines enter or leave the frame naturally. Avoid filling the sequence with random pans. One clean approach shot and one considered transition are usually more useful than ten variations of the same facade.
Gallery atmosphere
Inside, focus on the experience of moving through the museum rather than trying to record every artwork. Capture the scale of the room, the floor, the light, a turn into another gallery and the distance between visitors and the walls.
Leave handles on every shot. Record a few seconds before the movement begins and after it ends. This gives the editor room to cut without freezing the frame or hiding an abrupt start with a transition.
Artworks and context
For individual artworks, separate the contextual image from the reproduction. A wider handheld shot can show where the work sits in the gallery. A museum-supplied high-resolution file can provide the detail that the viewer needs to see clearly.
This approach also makes the edit more honest. You are not presenting a shaky, reflective phone recording as though it were a clean artwork reproduction. You are showing the visit as a visit and using an approved asset when the story requires a precise image.
Transitions that editors can use
The small connecting shots are often what make the final video feel complete:
- A hand putting a phone away before entering a gallery.
- The transition from the cloakroom toward the exhibition route.
- A doorway opening onto a brighter room.
- Stairs, corridors and changes in floor texture.
- A pause beside a wall label, without filming visitors’ private conversations.
- The return from an interior gallery to the pavilion’s glass exterior.
- A final wide shot that gives the audience a sense of where the visit ends.
These moments provide cut points between the major visuals. They also help a hotel or tourism client position the museum as an experience rather than as a list of artworks.
Dates and exhibition planning
If your timing is flexible, two calendar markers may influence the content plan: the Espace Riopelle — Michael Audain Pavilion grand opening runs October 22–25, 2026, and the Hyperrealism exhibition’s final day is October 12, 2026. Confirm the current schedule before building a campaign around either date, particularly if the content will be published after the visit.
A date-specific shoot also needs a stronger contingency plan. Exhibitions can be busy near major openings and final days, which may affect the amount of space available for discreet handheld coverage. If the date is editorially important, contact the museum in advance rather than assuming the public route will offer the same shooting conditions as an ordinary weekday visit.
The creator’s advantage is preparation, not access
MNBAQ is not a place where preparation means bringing more gear. It means knowing what the visit is for.
For a personal or editorial visit, keep the camera handheld, turn off the flash, respect the one-metre distance, keep bulky items out of the galleries and ask staff about anything the published rules do not clearly resolve. That includes external microphones, gimbals, presenter-led filming and any setup that begins to look professional or staged.
For commercial work, start the conversation early. An MNBAQ filming permit or venue rental is not an unnecessary complication when the brief requires control. It is the arrangement that gives the crew a clear space, a workable schedule and fewer unpleasant surprises.
For the edit, do not ask a phone to do the job of a museum asset. Use your own footage for architecture, atmosphere and movement. Request high-resolution artwork files for the moments that need clarity and rights certainty.
Buy tickets to the Musée national des beaux-arts du Québec online for a straightforward visit, but do not confuse admission with production approval. Pack light, plan the arrival, confirm the audio and opening-hours questions in advance, and choose the right filming path before you reach the entrance. That is how a museum visit turns into usable footage instead of a conversation with security and a folder full of almost-shots.
Practical info
Currency: CAD
Driving: on the right
Emergency number: 911