Neighborhood travel guide videos: a pre-shoot checklist
Most creators treat a neighborhood travel guide video like a casual weekend project: grab a phone, walk down a few pretty streets, drop in some B-roll of a café, and call it content.
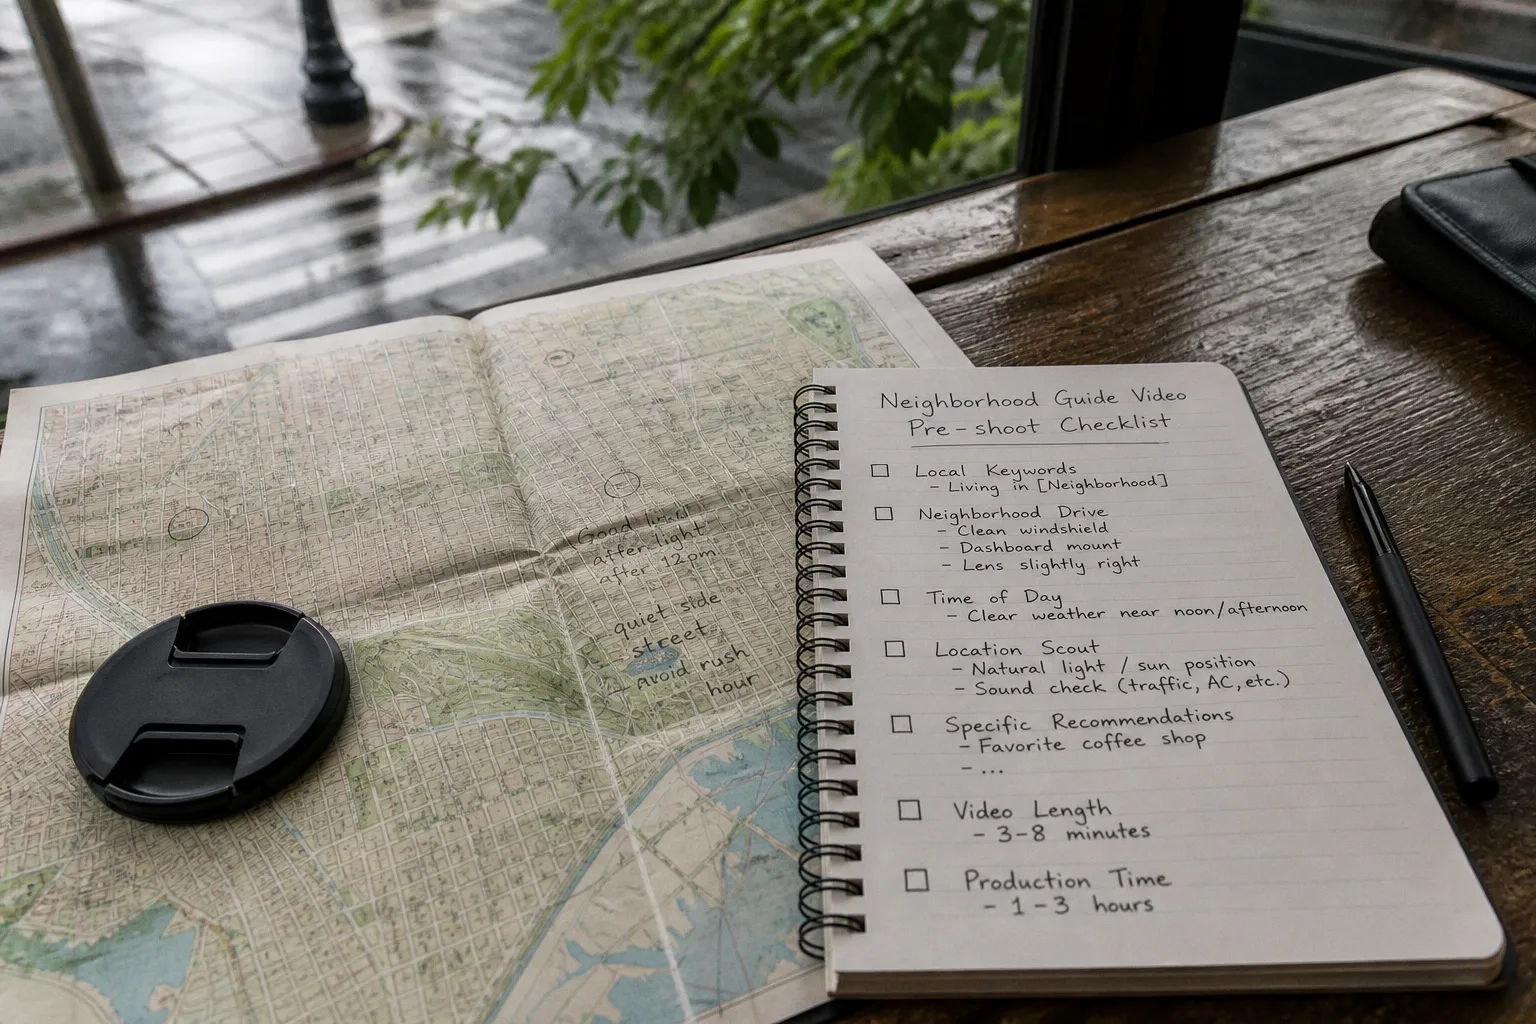
They post it, refresh analytics for a week, then wonder why the view count stalled at a low level.
That formula is stale. Audiences do not click because you filmed a coffee shop. They click because you told them which coffee shop, why it is worth their time, how to fit it into a real visit, and what they will see along the way. A good neighborhood guide answers those questions quickly, then keeps earning attention with useful detail rather than decorative footage.
No amount of 4K B-roll can rescue a video with no point of view. But a clearly planned route, honest local recommendations, and a useful first minute can make a modest production feel authoritative. The goal of neighborhood travel guide video prep is not to make the area look expensive. It is to make the viewer feel oriented before they arrive.
For hotels, guesthouses, destination teams, and local businesses, that distinction matters. A useful neighborhood video can do more than collect views: it can help a potential guest picture an afternoon outside the property, understand the location, and trust the person making the recommendation. That only happens when the planning begins before the camera comes out.
Strategic scripting for YouTube SEO and viewer retention
The opening of a travel video matters because it establishes the promise. It tells viewers whether they have found the guide they were looking for and gives them a reason to continue. There is no reliable universal formula in which a particular number of opening seconds carries a fixed amount of “algorithm weight,” and YouTube does not publish a simple keyword window that guarantees search visibility.
There is, however, a useful production heuristic: make the subject, place, and benefit unmistakable early. Viewers should not have to wait through a channel greeting, a cinematic drone shot, and a long explanation of why you love travel before they know what the video is about.
A strong opening might sound like this:
“This is a practical guide to Chicago’s West Loop for a first visit: where to get coffee, which streets are best for walking, and how to reach the river without wasting an afternoon.”
That sentence does several jobs at once. It names the destination, identifies the audience, gives the video a route or structure, and promises specific information. It also gives the title, description, captions, and spoken content a coherent subject without forcing keywords into unnatural phrasing.
Do this, not that:
- Do this: open with “Welcome to my neighborhood guide to [Neighborhood] in [City]. I’ll show you three coffee shops, the easiest walking route, and the block worth saving for sunset.”
- Don’t: spend the first thirty seconds on “Hey guys, welcome back to the channel” before the viewer knows where they are going.
- Do this: state the practical angle of the guide. Is it for a short city break, a hotel guest with one free afternoon, a family, a food-focused traveler, or someone comparing neighborhoods before booking?
- Don’t: promise “everything you need to know.” That usually means nothing and gives the edit no spine.
Script the promise, not every breath
A word-for-word teleprompter script can make a walking tour sound rehearsed. It also makes it harder to react to the street: a shop may be closed, a market may be busier than expected, or a detour may reveal a better recommendation. Plan the beats, not every syllable.
A useful script map for a neighborhood guide might look like this:
1. The orientation: where the neighborhood sits in relation to the city center, a major station, or a recognizable landmark.
2. The reason to visit: what makes this area different from nearby districts.
3. The route: how the viewer should move through it, in a sequence that makes physical sense.
4. The decisions: where to stop, what to order, what to skip, and what requires advance planning.
5. The practical finish: the best time to visit, how long to allow, and where the route ends.
Write down the facts and phrases that must appear, then leave room for natural delivery. If the host is on camera, rehearse the first two sentences and the transitions between locations. The rest can be delivered from short prompts on a phone or printed card.
The first part of the script is not merely a keyword payload. It is the contract with the viewer. If the title says “best coffee shops and walking routes,” the opening should not behave as though the video is a general history of the city. Search relevance and viewer trust both improve when the spoken promise matches the actual footage.
The same principle applies when the video is aimed at hotel guests. “A perfect afternoon near our hotel” is a weaker promise than “A walkable three-stop route from the hotel to the market, with coffee, lunch, and a quiet street for photos.” The second version gives the viewer a route they can imagine using.
Titles and thumbnails need a specific benefit
A title should identify the place and give the viewer a reason to choose this guide over a dozen similar results. Exact character limits and search previews can change across devices and formats, so treat 60 to 70 characters as a practical working range rather than a rule carved in stone.
Front-load the city, neighborhood, and useful angle where possible:
“West Loop Chicago Guide: Coffee Shops and Walking Routes”
This is more informative than “Things to Do in West Loop”, which sounds broad enough to belong to any generic listicle. A thumbnail can carry the emotional or visual part of the promise: a recognizable street, a distinctive storefront, a market stall, or a route view that helps the viewer understand the place.
Do not make the thumbnail promise a hidden luxury itinerary if the video is actually a budget walking guide. The fastest way to lose trust is to make the packaging more specific and exciting than the content itself.
The opening should not “game” search. It should prove, quickly and naturally, that the video is the guide its title promised.
Before the shoot, write the working title beside the route plan. This simple step exposes mismatches early. If the title emphasizes food but most of the route is architecture, either change the title or change the route. If the video is intended to help visitors staying nearby, include a clear starting point and an ending point that make sense from the property.
Mastering natural light and scouting the environment
Shooting a neighborhood tour is, by definition, an outdoor job. That means you are working with the sun, traffic, weather, opening hours, construction, and whatever happens to be parked in front of the building you planned to feature. Showing up once and hoping the location behaves is the fastest route to a reshoot.
A proper recce is not a formality. It is where the video’s visual rhythm is discovered.
Walk the route before you commit to a shoot day
Visit the location at the hour you plan to film. Sun direction in the morning is not sun direction in the afternoon, and a street that looks open in a midday reference photo may become a corridor of deep shadow later in the day. Note where the key facades, signs, entrances, and outdoor seating areas actually catch light.
Pay attention to the route as a sequence rather than a set of isolated shots. Can the viewer understand how one location leads to the next? Is there a safe place to stop and speak? Does the route cross a road repeatedly? Will the final recommendation be too far from the opening location to feel like part of the same neighborhood?
During the walk, check:
- Light direction: whether the main subjects are front-lit, side-lit, or disappearing into shadow during the planned window.
- Backgrounds: balconies, bins, delivery vehicles, temporary signs, reflective glass, and other elements that may compete with the subject.
- Sound: traffic, ventilation systems, train lines, construction, school bells, outdoor speakers, and dogs that may be quiet during the recce but active later.
- Crowd patterns: where queues form, when sidewalks become difficult to navigate, and whether a café’s best-looking area is also the loudest.
- Access: whether a business welcomes filming, whether a permit is needed, and whether you can stand without blocking customers or pedestrians.
- Safety: places to stop with equipment, safe crossings, and sections where talking to camera would distract the host from traffic or other hazards.
A two-minute sound walk is often more valuable than another ten minutes of looking at façades. Stand still, record the ambient track, and listen with headphones if possible. A location that looks calm can carry a constant mechanical hum that will become obvious once dialogue is layered over it.
Make weather part of the plan
Clear weather is not automatically the best weather. Hard midday sun can create deep eye sockets, harsh shadows beneath awnings, and bright patches that force the camera to protect highlights at the expense of faces. Open shade is often easier to work with, especially for presenter-led sections.
Late afternoon can add warmth, but golden hour is not a universal fix. Residential façades may go dim while the sky remains bright, leaving the host or the building underexposed. If the neighborhood’s architecture is the subject, prioritize readable surfaces over a romantic color grade.
Soft overcast is workable for walking shots and can make skin tones easier to manage. It may flatten driving footage, storefronts, and wide establishing shots, so plan for contrast through composition: strong lines, colorful signage, moving subjects, and a clear foreground.
Build a weather alternative before the shoot:
- a covered market or arcade for rain;
- interiors where filming permission has been confirmed;
- tighter detail shots that can be captured between showers;
- a voiceover-led section if wind makes live dialogue unusable;
- a second time window for the facades that must be shown in direct light.
The best local tourism video checklist includes contingency thinking because the neighborhood will not pause while you change batteries and wait for a cloud to move.
Match the visual plan to the story
Natural light is easier to manage when every shot has a job. A wide shot can establish the street, but it cannot also carry the detail of a shop sign and the host’s expression. Plan a small range of shot sizes for each important stop:
- a wide frame that shows where the location sits;
- a medium frame for the host or the entrance;
- close details such as menus, textures, signs, hands, or products;
- a moving transition that connects the stop to the next part of the route.
This does not mean turning a neighborhood guide into a rigid shot list. It means protecting the edit from a common problem: having twelve attractive wide shots and nothing that explains where the viewer is or what they should notice.
For hospitality brands, include visual cues that help viewers connect the neighborhood to the guest experience. Show the walk from the property, the nearest transit entrance, the first turn on the route, or the point where a guest would realistically begin exploring. These frames are more useful than another isolated shot of a pretty building.
Technical setup for high-quality neighborhood driving shots
The drive-through segment is where many location guides fall apart technically. Creators shoot from the passenger seat with a phone balanced on a knee, then publish footage that looks like a shaky dashcam upload from another decade. The problem is not always the camera. It is the lack of a controlled setup.
Mount for stability and visibility
Use a secure dashboard or windshield mount designed for the camera and vehicle. The mount should hold the camera firmly without obstructing the driver’s view, mirrors, or controls. Avoid improvised knee supports and loose suction cups that visibly vibrate at every bump.
Clean the windshield fully before recording. Viewers notice streaks, dust, fingerprints, and dried rain marks as soon as sunlight hits the glass. A clean lens and clean windshield can improve the perceived quality of driving footage more than a new camera body.
Frame with purpose. If the subject is the neighborhood rather than the road itself, angle the lens slightly toward the side that contains the facades, signs, parks, or storefronts you are describing. Leave enough forward view to establish movement, but do not let the curb occupy most of the frame.
A dashboard mount is not a stylistic choice. It is the difference between “I am showing you this neighborhood” and “I accidentally filmed a shaky car accessory review.”
A wide lens can help in a narrow street, but too much width makes buildings look distant and can exaggerate movement at the edges. Test the framing while parked. Check whether signs remain legible, whether the dashboard dominates the lower frame, and whether the camera is aimed through a tinted or reflective section of glass.
Separate driving from talking when necessary
Audio is the silent failure point of driving footage. Engine noise, road vibration, cabin echo, air-conditioning, and windshield noise can overwhelm a small camera microphone. A lavalier clipped securely to the driver before the engine starts may produce usable speech, but it still has to be tested in motion.
Never assume a microphone is working because its receiver is connected. Record a short sample while parked, then another while driving on a representative section of the route. Listen for clothing rustle, clipping, intermittent wireless dropouts, and the sound of the mount vibrating against the dashboard.
If the cabin audio is not clean enough, record the drive as visual coverage and add the explanation later. Voiceover is often the more professional choice because it lets you give precise context without asking the driver to perform, navigate, and monitor equipment at the same time.
Keep safety separate from production ambition. The driver should not adjust exposure, touch the camera, read notes, or respond to messages while the vehicle is moving. Set the camera before departure, use a passenger for monitoring when available, and pull over whenever a change is genuinely necessary.
Local rules also matter. Hands-free driving laws vary by municipality, and the fact that a mount is sold for cars does not automatically make every use lawful. Some jurisdictions focus on whether the device obstructs the driver’s view; others regulate interaction with the device itself. Confirm the local requirements before recording, and treat filming from a moving vehicle as a safety and compliance question, not just a framing problem.
Choose the format around the distribution plan
Horizontal video remains the natural format for long-form neighborhood guides, especially when the route, architecture, and driving footage need room to breathe. Vertical clips are useful for Shorts, Reels, and discovery moments: a single bakery recommendation, a quick street comparison, or a visually strong arrival shot.
Shoot with the intended crop in mind. If one production will serve both formats, keep essential faces, signs, and details within a central area that can survive a vertical crop. Do not let that compromise the main long-form composition, but do plan enough additional close-ups to make the shorter edits useful rather than awkwardly cropped excerpts.
Record short sections rather than one uninterrupted drive. Begin with a clean frame, hold the shot long enough for the editor to use it, and end before the next complicated turn or obstruction. Short, intentional clips are easier to organize and let the voiceover carry the route without forcing every second of the journey into the final cut.
Curating authentic local recommendations over generic B-roll
Generic B-roll is the death rattle of destination content. Every traveler has seen latte art, cobblestone streets, a slow pan across a market, and a wood-fired pizza oven glowing under warm light. Those shots can establish atmosphere, but atmosphere is not the reason most viewers search for a neighborhood guide.
They want the information that saves them a decision.
The hook is specific local intelligence. Name the place. Explain the choice. Give the viewer a useful detail that is difficult to infer from a map thumbnail.
Instead of:
- “There are many dining options in this area.”
- “This neighborhood has lots of great places to explore.”
- “You will find something for every taste.”
Try:
- “Order the cardamom latte at the small café on the corner before walking toward the river.”
- “This bakery is best for a quick breakfast because the queue moves faster at the side entrance.”
- “The prettiest block is two streets away from the main restaurant strip, and it is quieter before lunch.”
- “Save the market for the end of the route; it is close to the station and works well as a final stop.”
Do not invent intimacy. “Locals actually use this place” is a strong claim only when you can support it through genuine familiarity or direct observation. A recommendation can be valuable without pretending to reveal a secret. Explain what you know: the signature item, the best time to arrive, the price level, whether reservations are realistic, and what kind of traveler the place suits.
Build a route, not a pile of locations
Before filming, create a short list of possible stops, then reduce it to the locations that serve the story. Each stop should have one clear role:
- a useful arrival point;
- a café or breakfast stop;
- a street or architectural detail that explains the neighborhood;
- a practical food recommendation;
- a quieter detour;
- a viewpoint, park, market, or cultural anchor;
- a final stop near transport or accommodation.
The exact number matters less than the route’s coherence. A guide becomes tiring when it sends viewers back and forth across the area simply to collect more names. Geographic logic gives the edit a natural rhythm and helps the audience imagine following the route themselves.
For every featured business, confirm details close to publication. Opening hours, menus, prices, reservation policies, entrances, and temporary closures can change. If a recommendation depends on a particular service being available, either verify it again or phrase the advice honestly: “When open, this is a useful stop for…” is better than presenting an uncertain detail as permanent.
A practical recommendation should answer at least one of these questions:
- How long should the viewer allow?
- What is the best time to arrive?
- Is the stop suitable for a quick visit or a longer meal?
- Does it work for families, solo travelers, or guests with limited mobility?
- Is it close to the next stop, or does it require a separate detour?
- What should the viewer notice, order, or avoid?
That information is the difference between destination storytelling and a slideshow of businesses.
Use B-roll as evidence
B-roll works hardest when it proves the point being made. If you say a street is quiet in the morning, show the street at that time rather than cutting to a generic coffee pour. If you recommend a route for first-time visitors, show the turn, the crossing, and the landmark that confirms they are going in the right direction.
Capture details that make the recommendation credible:
- the actual entrance rather than only the exterior sign;
- the distance between two stops;
- a menu or display that supports the spoken description;
- the texture and scale of the street;
- the queue, seating arrangement, or access point;
- a recognizable landmark that helps with orientation.
Always consider privacy and permission. People in public spaces may appear naturally in a wide shot, but a close-up of a customer, child, employee, or private conversation raises a different set of editorial and legal questions. Ask before filming inside businesses, and make sure staff understand how the footage may be used.
A polished neighborhood guide does not need to make every stop look flawless. A crowded café, a steep stairway, or a noisy intersection may be important information. Selective honesty gives the audience a more useful picture and protects the business from attracting guests whose expectations the location cannot meet.
Managing the production timeline from pre-shoot to final edit
Good destination video shoot planning is mostly the management of small dependencies. The café needs to be open when the light is right. The host needs a quiet place to record. The driving route needs to be filmed before traffic becomes difficult. The final stop needs to remain available after the earlier sections run long.
Without a timeline, these details compete with one another.
Build the day around immovable conditions
Start with the elements that cannot easily be shifted:
- business opening hours and filming permissions;
- a particular light direction on an important facade;
- a market, event, or transport connection;
- traffic conditions on the driving route;
- the host’s availability;
- weather-sensitive locations.
Then place flexible coverage around them. Detail shots, cutaways, street textures, and additional exterior footage can usually be captured between scheduled moments. This keeps the day from collapsing when one location takes longer than expected.
Leave more time than the walking distance suggests. A route that takes a short time for a visitor may take much longer with equipment, repeated takes, permission conversations, sound checks, and pauses for pedestrians. The video should feel unhurried even if the production day is tightly managed.
A simple planning table can clarify the order:
| Production element | What to confirm before filming | Why it affects the edit |
|---|---|---|
| Opening location | Access, sound, light, and the first spoken line | Establishes the video’s promise and visual identity |
| Walking route | Turns, crossings, stopping points, and realistic travel time | Creates continuity instead of disconnected locations |
| Featured businesses | Permission, hours, best filming position, and current details | Keeps recommendations accurate and usable |
| Driving section | Mount, framing, audio, route, and safety responsibilities | Prevents unstable footage and unsafe production decisions |
| Closing location | Practical ending point and final takeaway | Gives the viewer a clear sense of what to do next |
Organize footage while the route is still fresh
Do not wait until the end of the week to identify clips. Label cards, folders, or takes by location and purpose as soon as possible. “Street clip 14” is almost useless when the edit contains several similar streets. “West Loop — entrance — clean wide — afternoon” gives the editor something to work with.
For each location, try to leave the edit with:
1. an establishing shot;
2. the host’s explanation or a clean voiceover option;
3. supporting details;
4. a transition toward the next stop;
5. room tone or usable ambient sound.
Check the footage before leaving the area. Look for focus problems, clipped highlights, unwanted reflections, unreadable signs, and audio interruptions. A quick review in the field can save an entire reshoot, particularly when the location is difficult to access or the business will not be available again.
Back up the material before formatting cards. Keep the original camera files, audio recordings, notes, and any release or permission records together. For a hospitality team producing several neighborhood videos, a consistent folder structure makes future updates much easier when a business changes its hours or a route needs to be refreshed.
Edit for orientation and momentum
The first cut should be judged by a simple question: can someone who has never visited the neighborhood understand where they are and why the next stop matters?
Cut anything that repeats the same point. If three similar shots establish a storefront, keep the one that has the clearest sign or the most useful movement. Let a recommendation arrive before the viewer becomes impatient, but give it enough visual evidence to feel earned.
Use maps, labels, or restrained on-screen text when geography would otherwise be unclear. A label should support the spoken explanation, not compete with it. Captions should be checked manually, especially for street names, business names, and local terms that automatic transcription may misunderstand.
The final edit should also preserve the uncertainty that belongs in a real guide. If a street is usually quiet but becomes busy at lunch, say so. If a restaurant is a good choice for atmosphere but not for a rushed schedule, make that distinction. Viewers are more likely to trust later recommendations when the video does not pretend every part of the neighborhood is perfect for everyone.
Plan the update cycle before publishing
Neighborhood content ages quickly. Businesses close, menus change, roads are redesigned, and a temporary construction site can become a permanent feature. Keep a record of claims that may need updating and avoid building the entire video around details that are likely to expire.
For hotel and destination marketing teams, this is especially important. A video embedded on a property page or shared with guests can continue working long after the original social post has disappeared. Assign ownership for checking the route, links, opening information, and featured recommendations. An accurate, slightly less flashy guide has a longer useful life than a beautiful video full of outdated promises.
The best neighborhood guide video production is not the production with the largest camera package. It is the one in which the research, route, light, sound, safety, and editorial promise all support one another. Start by deciding what the viewer needs to know, then choose the locations and shots that answer that need.
A neighborhood does not become compelling because every frame is cinematic. It becomes compelling when the viewer can see how to spend time there, what is worth noticing, and how the experience fits into a real trip. Do that work before the shoot, and the camera has a much better chance of capturing something people will actually use.